This article describes how you can set up the menu items and landing page on the web app.
We are gradually updating all Floqs to a new version in which the home, menu and pages are completely revamped. If your Floq is already on the new version, refer to the article about setting up the home page and menu.
The web app and mobile app both use the same event data. However, the menu can be configured separately, leaving you to be flexible on what you want to include and what is maybe less relevant, for example because you have the information elsewhere. can configure the contents of the menu through the Pages & Structure, tab Web app. Please note you have to publish a release to make the changes visible to your users.
Configure the menu
In the Menu items section, you can configure the web app side or top menu.

A few important points to notice when composing the side menu:
-
If you want to show a daily programme, it has to be a direct link from the side menu. A navigation page referring to multiple programmes will not work. So if you have a scientific and industry programme, create two menu items.
-
To add a page with a news feed only, select the page below Feed.
-
To add the attendee list or social wall, select it below Networking pages.
-
If any page contains a link to a URL, this link will always open in a new tab.
For each menu item, you can configure an icon, similarly to that of the home menu buttons. If you select an icon from the library, it will be coloured with the contrast color set at that moment.
You can also choose to overwrite the original page name with another name by entering that below Name.
Configure the landing page
For your web app, you can create a landing page with a news feed, video, upcoming sessions and links to other items within your web app.
Layout
On your landing page, you can choose to display your news feed on the right side of the page, or to only display tiles. The preview in the frame below is adjusted automatically.
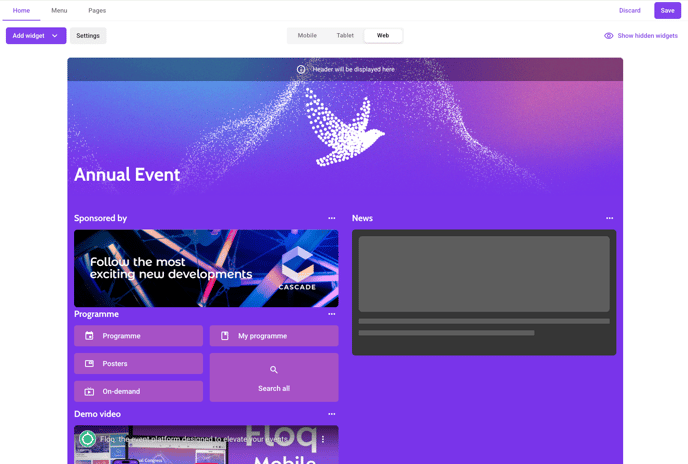
Add tiles
There are different tile options for your landing page:
-
Video: with this widget, you can embed a video stream onto your landing page. This can be a live stream or static video. Make sure to have your video uploaded to YouTube or Vimeo, as these are the only platforms supported. Additionally, ensure that both the video you are linking and the account which initially published it have their privacy settings set in such a way, that you can view the video on the third party' website - the web app.
-
Upcoming sessions: this widget allows you to select a Happening Now/Next page. The sessions that would show on this page, will be shown as a list on the widget.
-
Menu tiles: Menu tiles are links to any other pages in the Web App. Please note that the page you link should also be added in the side menu. If it is not, you will get a warning. You can choose between different layouts: 4 small, 2 medium, 1 large or 2 small and 1 medium. You can upload a custom image as background of the tile, or choose from a selection of icons, add a background color or label.
Make sure to click Save in the toolbar to save your changes. When configured, the landing page will be added automatically as first page in the side menu. It is then the first page your users will see. A release is needed to push your changes to the web app.
Rearrange tiles
To rearrange tiles or tile groups, hover over and click the tile, and drag the tile or group to its new position.
Hide tiles
To hide tiles temporarily, click the 3 dots on the top right of each tile. To see the hidden tiles, you can click on 'Show hidden widgets' on the top right.
Remove tiles
To remove tiles or tile groups, click the 3 dots on the top right of each tile.