This article describes how you can import data from a channel and how you can lock items to prevent them from being overwritten when the channel is synced.
We are gradually updating all Floqs to a new version in which the data types, data editors, integrations and releases are completely revamped. If your Floq is already on the new version, refer to the new article about the programme data sync.
A channel connects your data directly to our system. That means you only have to manage the data in one place. You can then decide to sync the data to our platform manually or set up a scheduled job to do so.
Add a channel
Adding a channel involves work from our side. Contact your Customer Success Manager for more info.
Run a channel
Once a channel is set up, you can run it by pressing Run channels in the toolbar. This will import the data from the channel(s) and after that create a release. In the case of multiple channels, the channels will be run in the order in which they are listed, so if there is any duplicate information, that of the last channel is used.
The results of the run can be found in the table. In case a run has failed, a red icon with a cross is shown in the Status column. In the logs, more info about the reason why it failed can be found.
Schedule a job
If you want to schedule a data import and release for later, you can use the tab Scheduled jobs. This will 'click' the Run channels button at the moment you schedule it.
Click Add job and select the date and time of the (first) occurrence and its timezone. If you choose to repeat a job, also select the last occurrence. Click Add to save the job. In the table, you can see the results of the job: its type, when the last run was, when the next run will be and what the status of the import and the release was. If an import or release fails, check the logs in Channels or Releases for details.
You can do as many recurring jobs as you want. You can for example set a weekly update in the month before the event, a daily update in the week before, and an hourly update during the event, to make sure your users are up to date.
Tip! Jobs are scheduled in the CET timezone, take this into account when selecting a time.
Lock fields, objects and sections
Channel-imported data of events can be locked to prevent it from being updated or deleted the next time an import is run. This prevents the locked items from being deleted or updated.
When you import your data from a channel, the data within your 3rd party system should be the leading source. If changes need to be made to the data, we recommend doing it within that system, and then syncing those changes to the app data again.
For different reasons, it could however happen that you need to make your changes in our system instead. If you're making manual changes to this channel-imported data, they shouldn't be overwritten again the next time your channel is run. To prevent this, fields and sections of data coming from a channel are automatically locked when you make manual changes to them. If an item is locked, a red lock appears (see below).
Fields
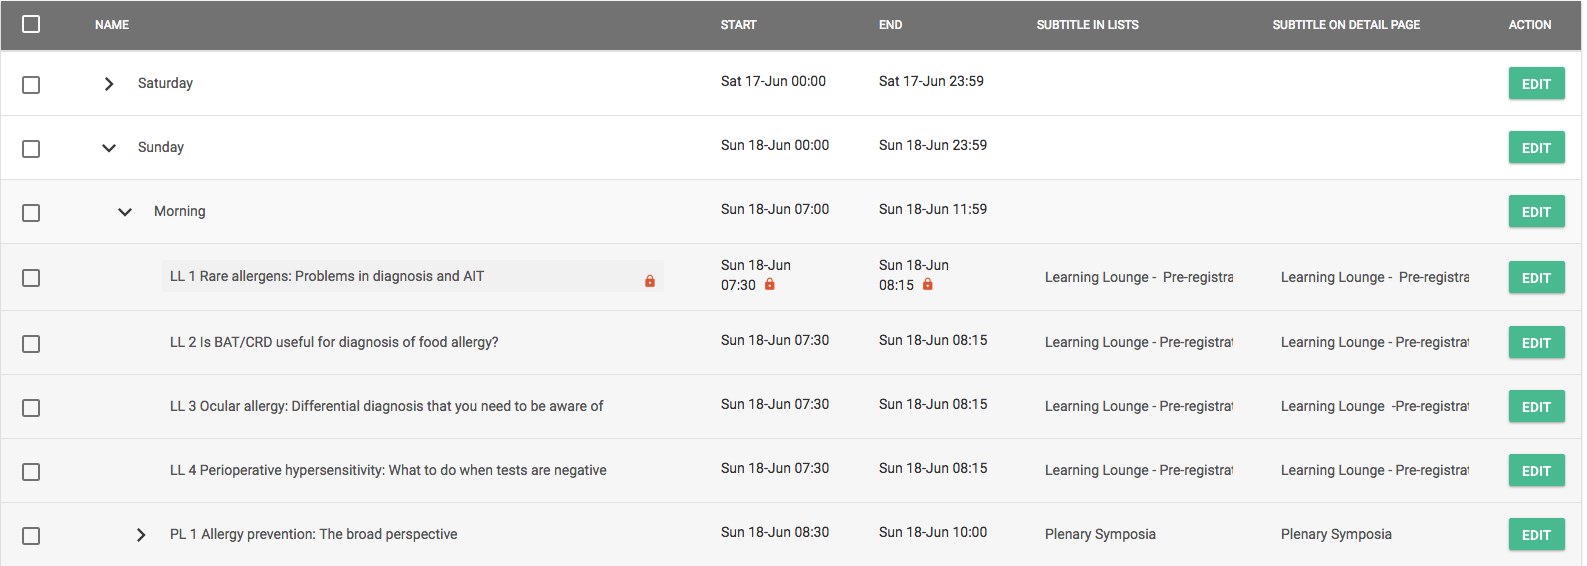
When talking about fields, we refer to the input fields below General. As soon as you make changes to them, the fields are locked automatically. A red icon appears next to the field label. The status is updated to reflect that the item was imported from a channel, and then updated.
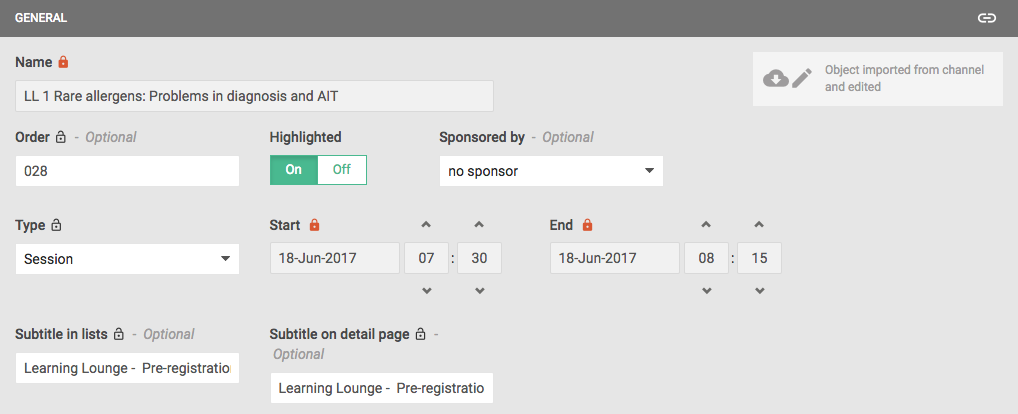
To unlock a field, click the lock icon again. The field value will then be overwritten by the data coming from the channel the next time an import is run. Please note that fields that are not supported to be updated by a channel cannot be locked.
You can also make changes to the fields from the table overview. The same applies here: when editing the table fields, they are locked automatically. An orange icon is added at the bottom right of the field.
Sections
Besides the fields below the header General, most items have a number of so-called Sections. Sections describe a relation between the item you're viewing and the objects in it. The section Chairs in the screenshot below for example, lists all persons that have the role of chair in it.
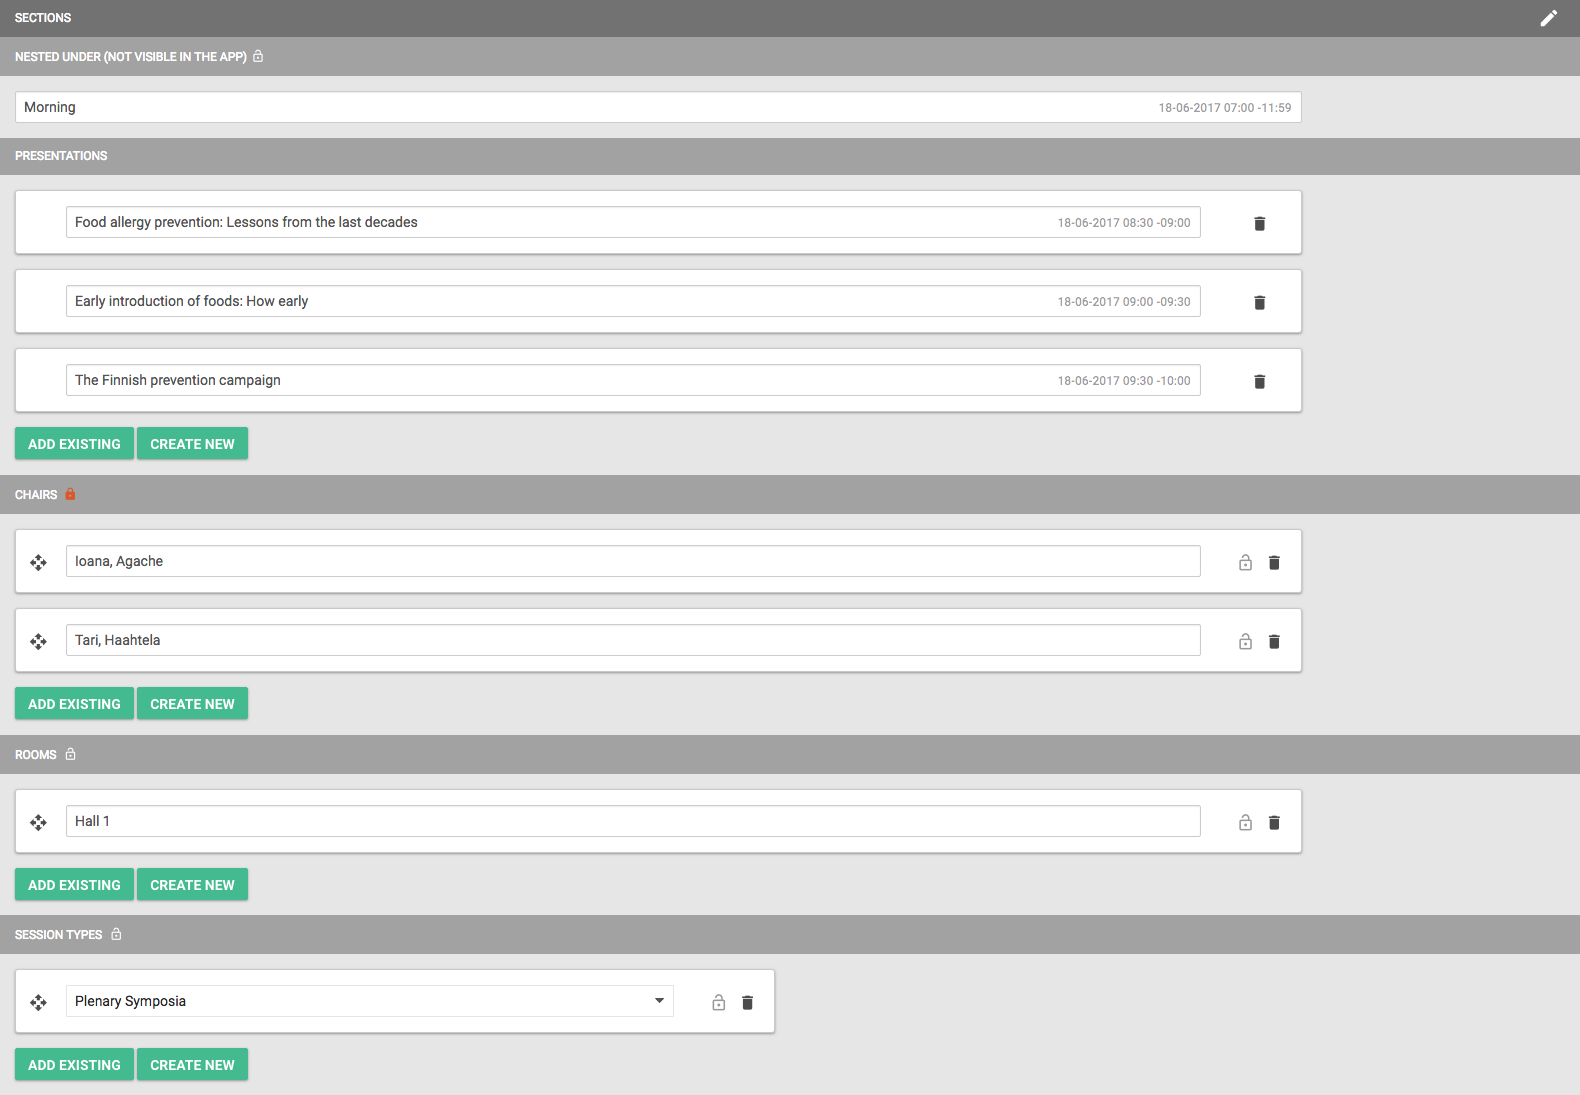
A section is automatically locked when you make changes in it, so you don't have to manually do so. These changes for example include:
-
changing the session a presentation is nested under
-
changing the order of the chairs
-
adding a topic to the topic list of a session
-
deleting a speaker from the speaker list
When a section is locked, no items can be added to or removed from it by the channel anymore, and, if applicable, the order of the items will remain unchanged. The properties of the item, such as the name of a person or session, will however be updated if it changes in the channel.
If a section is locked, the icon in the header is updated. You can also manually lock a section by clicking this icon.
Advanced
Besides fields and sections, there are two other options for locking. As most cases are covered by automatically locking these, as described above, using the advanced options should not be needed. They are however supported for exceptional cases where locking fields or sections does not suffice.
- Items in a section: You can manually lock an item in a section by clicking the lock icon on the right. This prevents the item from being deleted or edited by the channel, but allows other items to added to the section with an import. Use this only when locking the section doesn't provide the desired results, as it might cause unpredictable situations.
- Objects: you can also lock complete objects. When doing this, none of the fields or section data is updated anymore with a channel import. As most likely the channel contains the most up-to-date information, it is undesirable that none of this info is imported anymore. Instead, only the relevant sections within the object should be locked. There are two ways to lock a complete object:
- Select a table row in the overview by clicking the checkbox and click the button Edit selected. Change the Status in Locked. To unlock, do the same but change the Status to Unlocked.
- On the detail page of an item, click the Lock button at the top right. The button will change in Unlock.