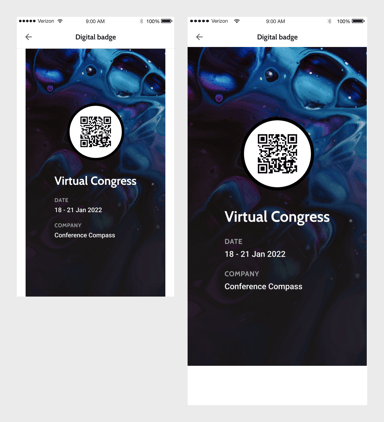
Digital badge
This article describes how you can give your attendees a digital badge and how they will see that in the mobile or web app.
You can give each attendee of your event a digital badge. The badge is accessible through the user's profile in the mobile and web app. During the event, the digital badge can be shown to access the venue, access session rooms, exchange contact info with exhibitors, etc. The badge should contain a QR-code or barcode, similar to a digital boarding card.
Note that the mobile or web app only displays the digital badge. Creating the badge, scanning badges and processing results does not happen within the Conference Compass platform.
How to add the digital badge?
On the detail page of the attendee in the studio you will find a a section Event specific info, right below the General section. This section only appears within the event, so not on community level, as it is always related to one event.
The field is empty by default. You can add a digital badge by adding a URL to a JPG, PNG or PDF file. Other formats are not supported. The field can be populated in three ways:
- through the Attendee Sync.
- with an Excel import. Add a column badgeURL in the template after the last column and add the URL in the fields below it.
- manually.

User experience
If the attendee is linked with a digital badge within the event, a new item is added in the profile menu. If no digital badge is linked, the menu item is not shown. Please note that this setting is event-specific, so it could be that in one event the item is shown, while in others it isn’t.


When clicking on Digital badge in the profile menu, the image or PDF that was included in the data is displayed full-screen (mobile) or in the same side panel (web).
