Payments
If you charge a fee for your event, you can decide which method of payment should be made available to your registrants. You can choose which payment options are available such as bank transfers, online payments or other payment methods.
Bank transfer

You have the possibility to organize paid events and to have registrants pay either via a bank transfer, an online payment gateway or through another payment method.
By default, Bank transfer is the only payment method activated for paid events.
In the WYSIWYG, edit the texts registrants will see when selecting a method of payment, on the check-out page and in the confirmation email. You can, for example, enter the details of the bank account on which registrants will make the payment, as well as the communication they should enter and any other details if necessary.
Online payment

Easily set up multiple online payment gateways to let your registrants seamlessly pay for their registrations online. Floq event registration provides a wide array of different gateways. First, select your preferred payment gateway from Profiles (from the left side bar menu) > General > Online Payments.
You will find useful information for each payment method in the blue banner. Follow the instructions carefully to set up your payement gateway correctly. Make sure to enter the keys without any space before or after.
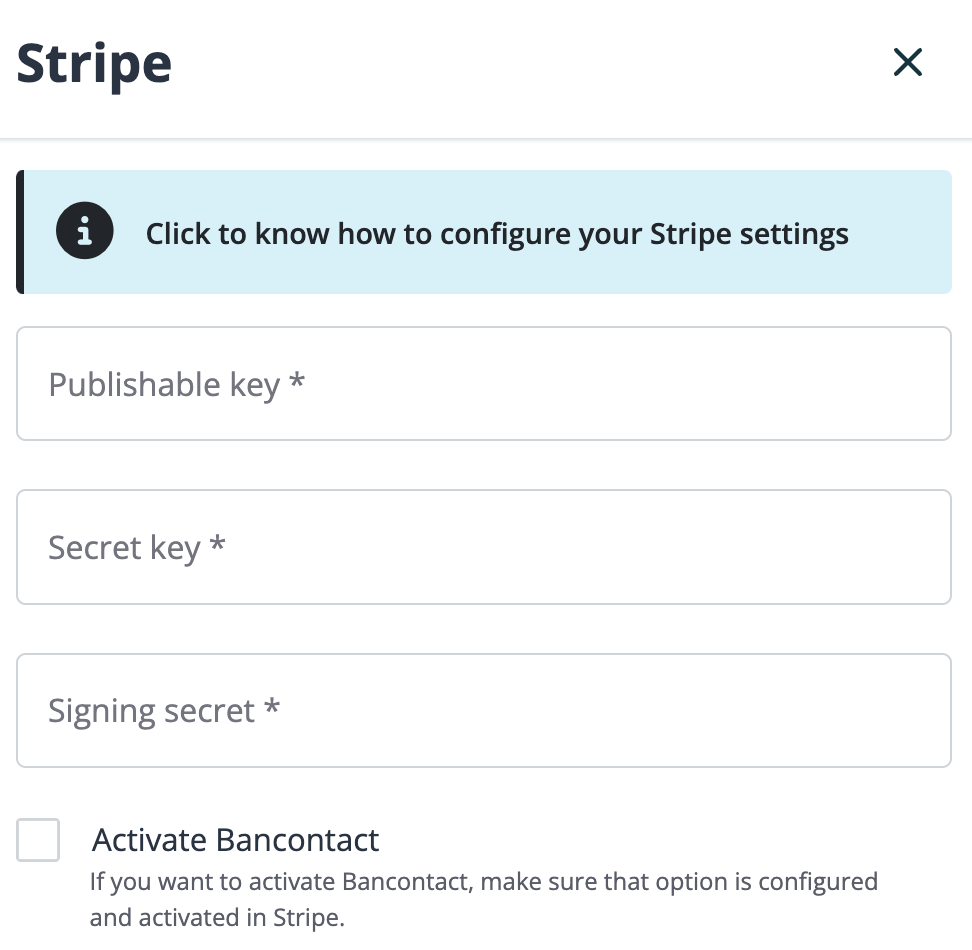
Once configured, go back to Money > Payments and select your gateway. From there, you will have the option to activate the automatic cancellation of unpaid registrations
In the WYSIWYG, edit the texts registrants will see when selecting a method of payment, and when their payment has succeeded or failed on the check-out page and in the confirmation email.
- Unfinished credit card payment procedure
If for some reason, a registrant did not complete the payment procedure by credit card, the payment status is set to Waiting for payment.
Other payment method

Finally, if you want to give your attendees another payment method than a bank transfer or an online payment, such as paying by cash at the entrance of the event for example, simply toggle the Activate other payment method button and enter the explanatory text accordingly in the WYSIWYG content editor.
Administrative fees
This feature allows you to add an administrative fee to the total amount of the booking depending on the payment method.
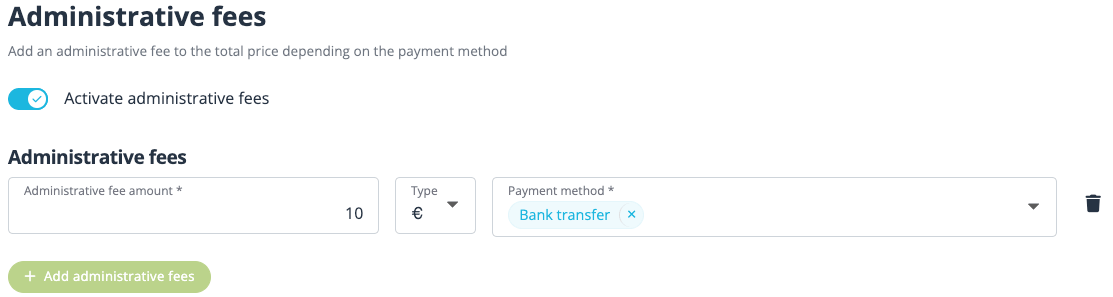
You can add an additional administrative fee by activating the toggle Activate administrative fees.
Once you have activated the toggle, decide the amount of the fee by choosing a fixed price or a percentage of the total price of the booking and choose to which payment method(s) this fee applies.
In this example the organizer has applied an additional administrative fee of €10 on the total price for registrants paying by bank transfer.
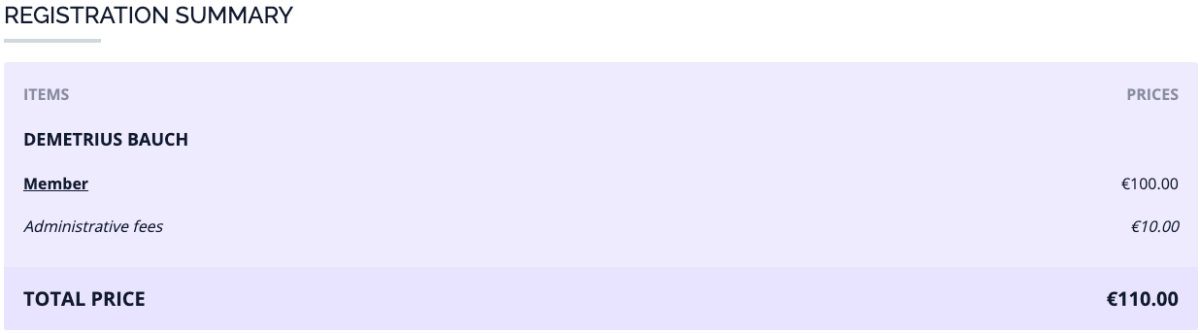
After selecting a ticket, the registrant will choose the payment method of his choice.
In this example the registrant selects paying by bank transfer and not pay online and therefore the additional fee of €10 on the total amount of the booking is applicable.
Threshold for certain payment methods
This feature allows you to choose certain payment methods that will be available at a desired amount. The default payment method will only be available if the threshold is not met. Once the threshold is met, all the payment methods activated for the threshold will be made available for the registrants to pay by.
For the feature to be available for set up, you must have multiple payment methods selected. You can choose between bank transfer, online payment method or “other”.
Once you have selected multiple payment methods, you can activate the threshold feature by clicking on the toggle switch.
Start by choosing the payment method(s) that will be made available on the event website by default at any price.
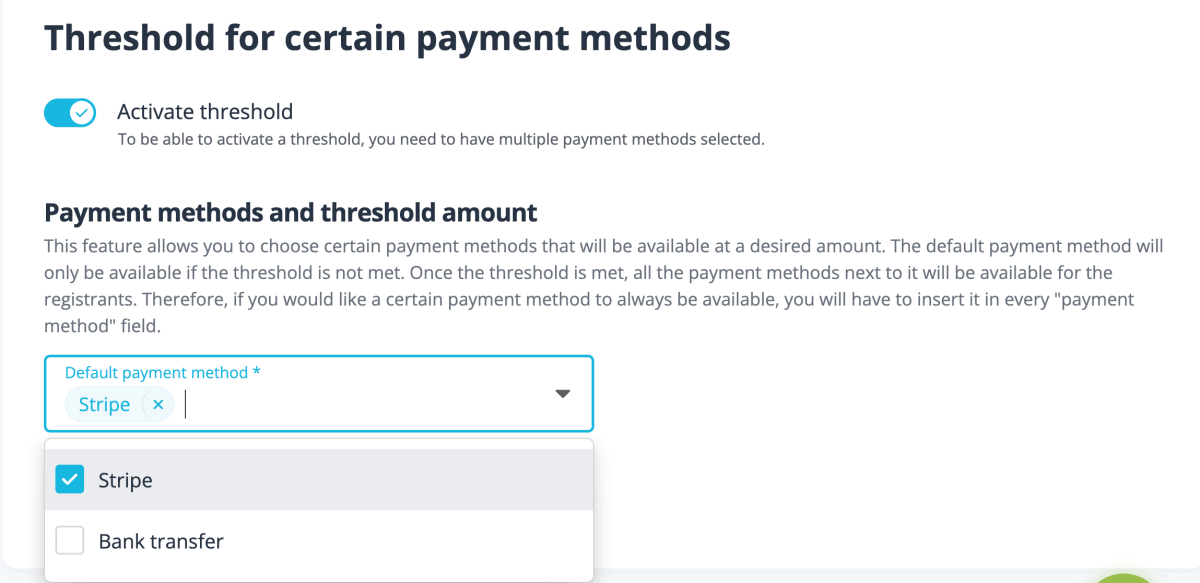
You can then decide on the minimum price amount that needs to be reached before this payment method becomes available on your event website. Once you determined the threshold amount, decide on which payment method(s) that you want to apply the threshold to.
You will need to add the chosen default payment method in the threshold if you want to make it available when the threshold is met.

If you would like a certain payment method to always be available for registrants, you will have to activate it as default payment method as well as in the threshold.
Invoicing
When organizing paid events, manage the invoicing by creating tailored invoices, proformas and credit notes for your registrants. Edit your documents prefixes and codes, starting numbers and content, choose to automatically send the invoices with confirmation emails or to generate them manually from the backend. This feature will save your financial department countless hours of administrative work.
Every generated documents (invoices / proformas / credit notes) can be viewed in the attendee's details page in the Money > Invoices section and the Money > Credit notes section.
Define your documents preferences
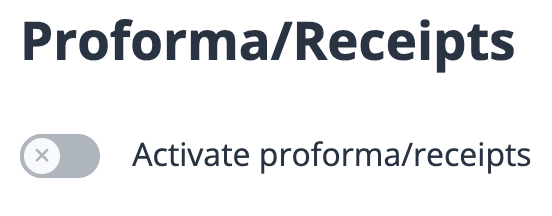
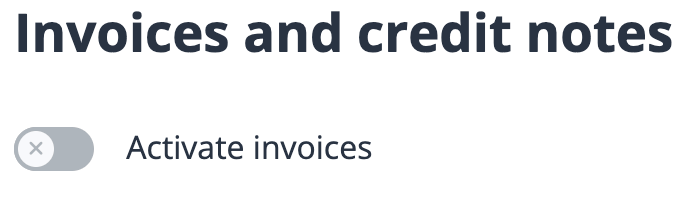
In Money > Receipts and invoices, you will find different options to setup your accounting documents accounting to your preferences: receipts (proformas), invoices and credit notes.
- Activate only the documents you need between Proforma/ Receipts, Invoices and Credit Notes.
- Prefix and start number for Invoices, Proformas & Credit Notes
Choose your documents prefixes and start numbers makes it easy for you to integrate your event accounting documents to your company’s books, or to create a separate book for any specific event. You can use the same prefix across several events. Set the invoice, proforma or credit note prefix - typically the accounting journal code. And then set the number of the next invoice to issue - numbering is then automatic.

- Edit the text displayed on your documents
Use the WYSIWYG content editor to add a description in your documents to give more information to your registrants. Improve your email communication by using Conditions and Merged fields.
- Attach your documents to confirmation email
Automatically send the invoice and/or proforma documents with the confirmation emails. Note that the payment status is mentioned on the documents.
Manually generate proformas, invoices, or credit notes
From the list of attendees, click on Generate invoice / proforma / credit note from the 3-dots button appearing next to each attendee's name. If you prefer to do this from an attendee's details page, the same action is available with the More Actions button. This will automatically generate the requested document.
Note that your invoices or proforma documents are automatically created and sent out to registrants if you have checked the option in your event settings.
How to modify an existing invoice/credit note to take into account attendee choice modifications
Attendee choices can be modified one of two ways:
- Attendees modify their registration themselves
Allow attendees to modify their registration needs to be enabled in Tickets > Settings > Ticketing.
Be aware that attendees can only add options, and not remove any, the price difference is therefore always positive. Upon confirmation of the modifications, they will receive an incremental invoice with the price difference.
- Organisers modify attendees choices in the backend
In the backend, you can change any attendee's option in the attendee's details.
If you add options: the system will automatically generate an incremental invoice, displaying the price difference (in a separate invoice, with a new number).
If you remove options (price decrease): the system will ask you if you want to generate a credit note and a new invoice. The credit note will cover the first invoice and the newly generated invoice will cover the attendee's registration. It is not possible to generate partial credit notes.
In any case, the system will first ask you through a pop-up window if you want to generate any new documents. Should you decide not to, you will always be able to go back to the More actions menu and decide to generate new documents manually.
Attendees transactions
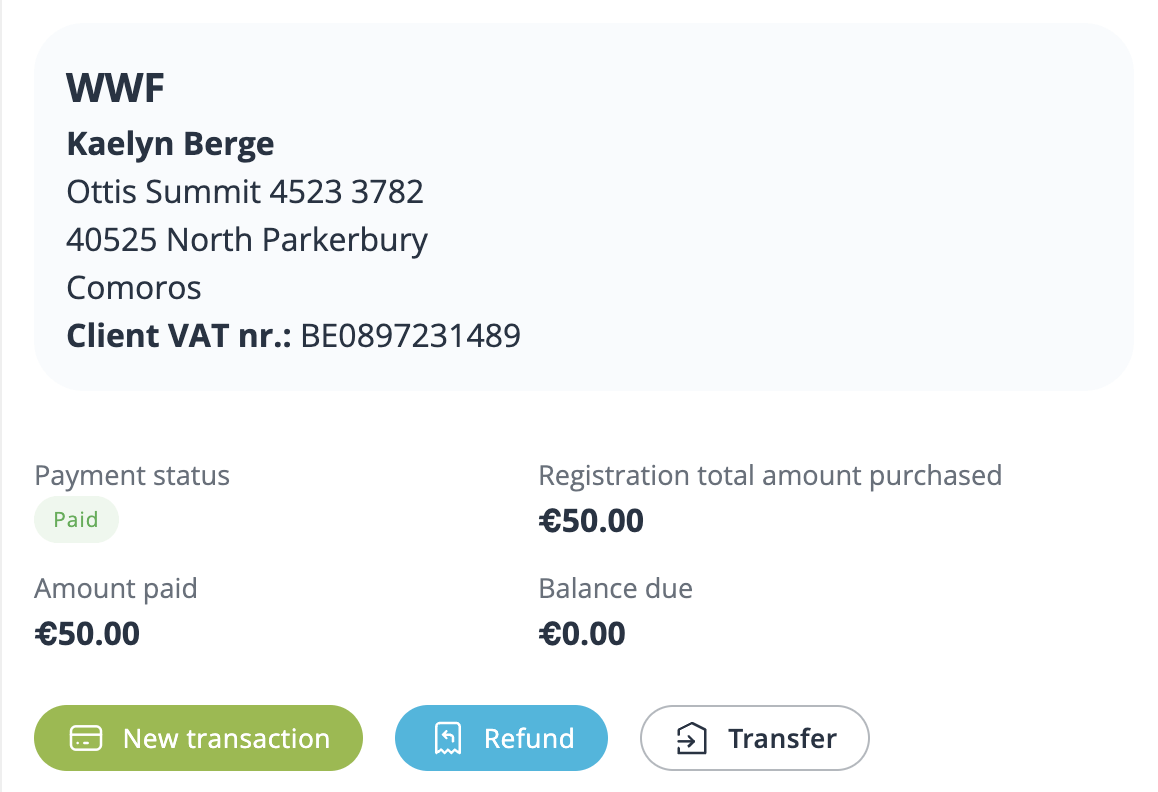
Go to General > Attendees > Attendees's details to access the Attendee Payments section. It is divided into three main areas: Payment details, Documents and Transaction timeline.
Payment details
Where all transactions can be entered or modified.
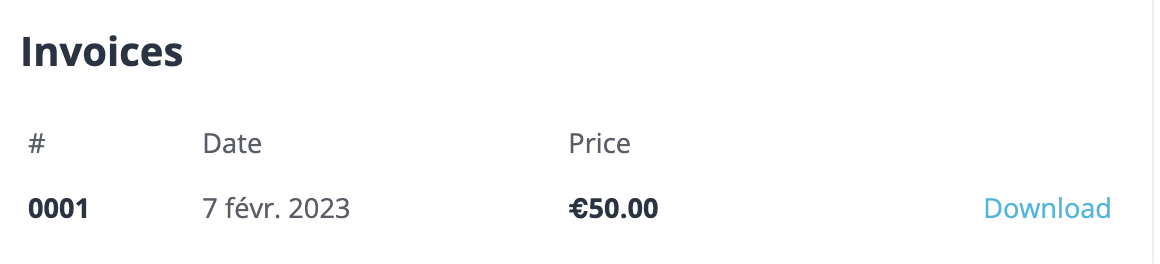
Documents
Where all documents issued regarding the attendee are displayed and ready to be downloaded.
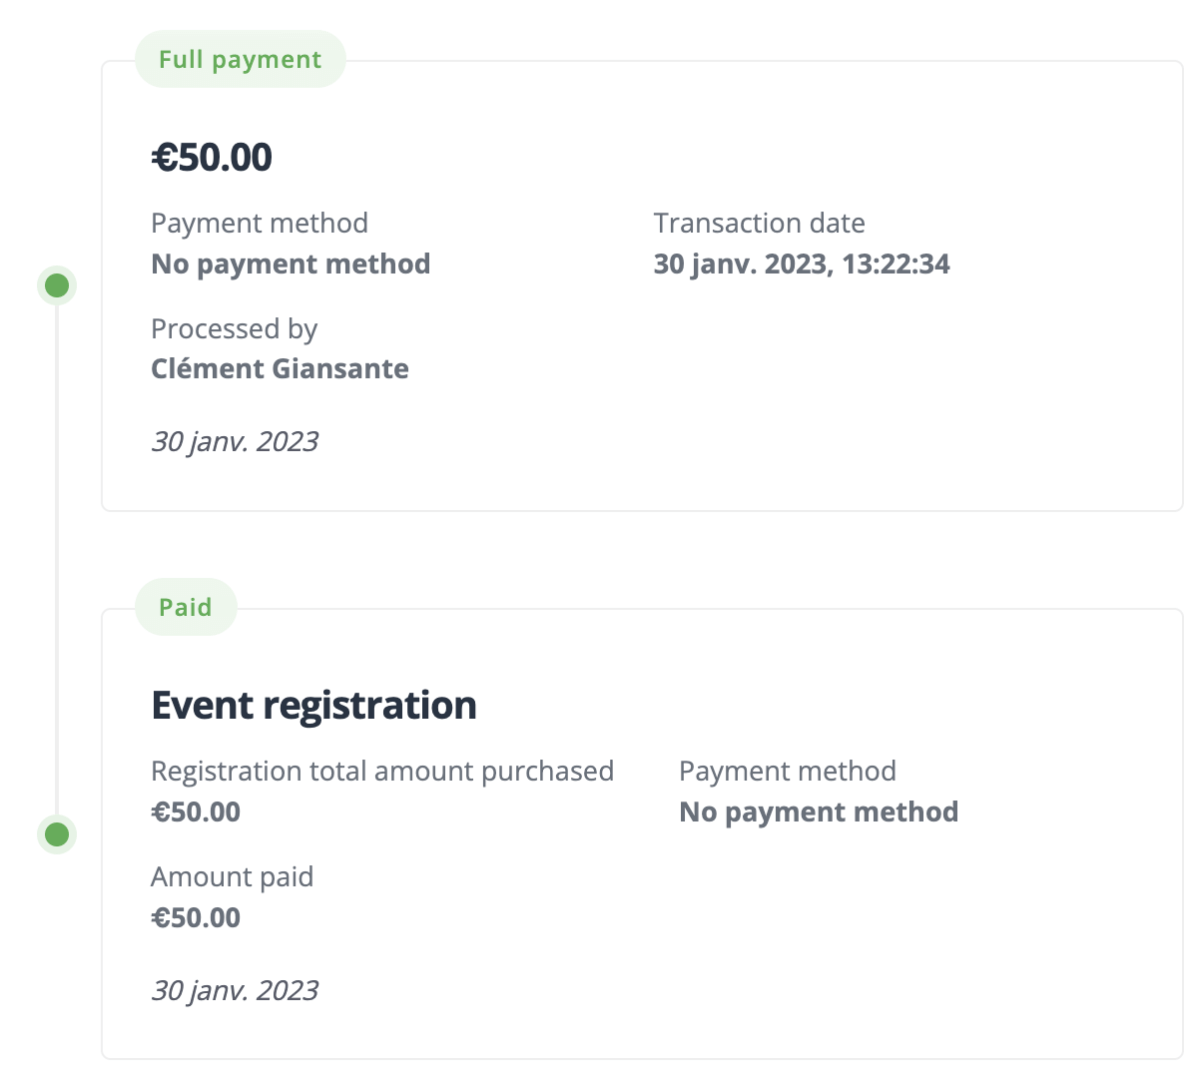
Transaction timeline
This feature shows all the logged payment operations into a comprehensive and straightforward transaction timeline in which all transactions from the moment of the registration until now are displayed.
Refunds
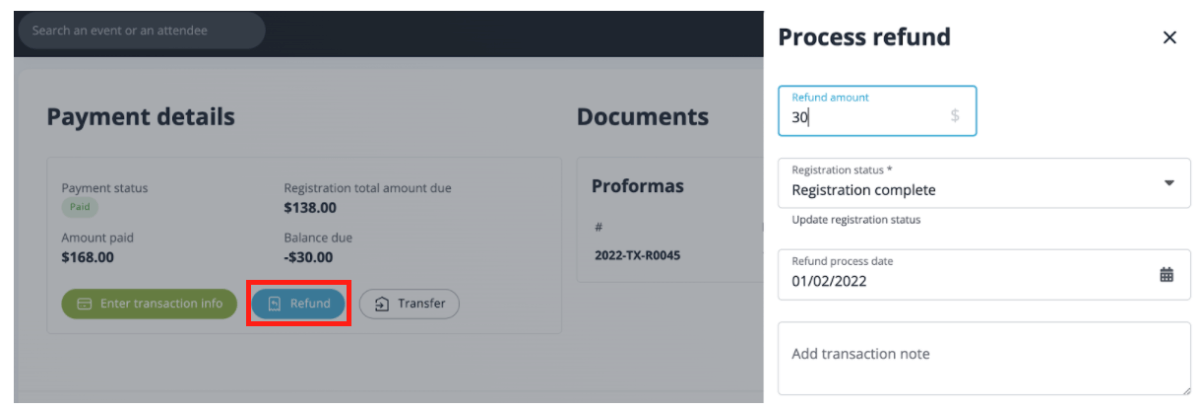
Should an attendee overpay, it is now possible to account for a compensation that was made towards that attendee. Enter the refunded amount and the payment status of the attendee will automatically update. Refunding the amount that was due to the attendee will remove the “overpaid” tag, while refunding more will flag the transaction as an overpayment.
Be aware that the refund itself must be done separately in the payment provider and not in the back-end of the attendee details, as only the payment status and the amount due change.
Transfers

Transfer funds from one attendee to another and you can even do so across different events. Again, this feature doesn’t allow you to transfer the money (say via another Stripe payment), rather it helps keep track of the flow of money between attendees and helps you in your management of over and underpayments.