In the Files & media menu item, you can find the images, recordings and other files related to this event:
- Images & Icons: profile pictures and logos that you've added for your persons and institutions on the Images tab. Custom icons you've uploaded, for example for tags or navigation pages, can be found on the Icons tab.
- Recordings: containes the pre-recordings, session recordings, introduction videos and audio recordings created or uploaded within this event.
- Documents & files: allows you to add other files you need in the event, such as PDFs or spreadsheets.
You can use the Search bar at the top right to quickly find images or files by name.
Images & icons
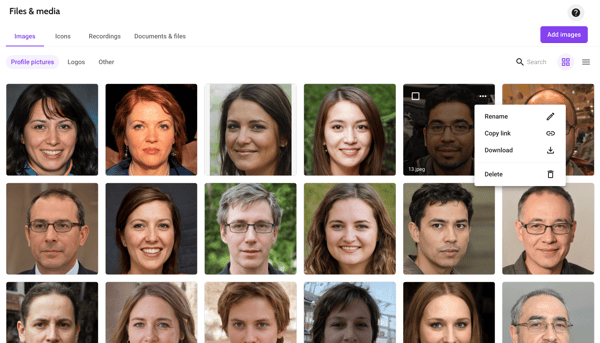
You can view the images as tiles or a list through the switch at the top right. ![]()
Upload images and icons
Images or icons can be uploaded by clicking Add images or Add icons on the respective tabs. Select the files, and for images also choose a category:
- Profile pictures: for persons
- Logos: for institutions
- Other: for images you want to refer to on other pages, such as information or navigation pages. Click ... and the Copy link to get the URL.

Click Add to upload the images.
Download images
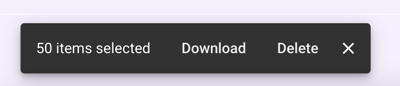
To download one image, click ... and choose Download. To download multiple images, select them and choose Download from the batch edit toolbar. They will be downloaded as a zip file.
Delete images
To delete one image or file, click ... and choose Delete. To delete multiple, select them and choose Delete from the batch edit toolbar. You're asked for a confirmation before the image is really deleted.
Assign images in the data editors after uploading
In case you have all your person photos or institution logos in one folder on your omputer, it can be useful to upload them in the file library. This way you can upload them all at once, and select the right image in the data table. Make sure that you choose the right category (Profile pictures or Logos) and that the uploaded images are square.
After uploading the images, go to Data > Persons or Data > Institutions. Open the table settings from the icon at the top right ![]() and make sure Profile picture or Logo is enabled.
and make sure Profile picture or Logo is enabled.

 Then click the Pencil icon
 ![]() next to the Import/Export button to open Edit mode. In this mode, you can then easily select the right image for every person by clicking in the cells in the column Profile picture.
next to the Import/Export button to open Edit mode. In this mode, you can then easily select the right image for every person by clicking in the cells in the column Profile picture.
Tip! For easy recognition in the dropdown list, make sure that the image is named after the person or institution.
Recordings
The Recordings tab gives you an overview of all pre-recordings, session recordings, introduction videos and audio recordings in this event. These recordings are created or uploaded from the moderator, speaker or host dashboard.
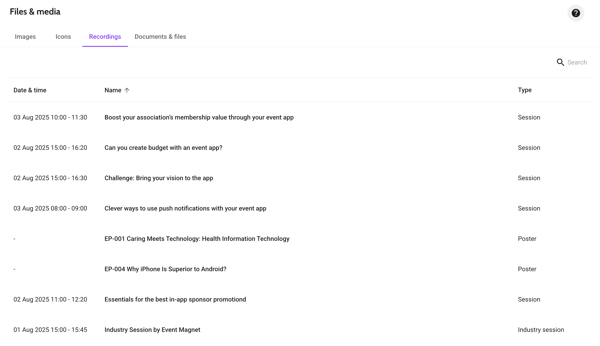
The list displays the date and time of the session, the session name, and the session type. Sessions without a time show a dash in the date column. Click the column headers to sort the list by that property.
View and manage a recording
Click on any row to open the recording detail page. Depending on the type of session you selected, you will different sections here for the different types of recordings.
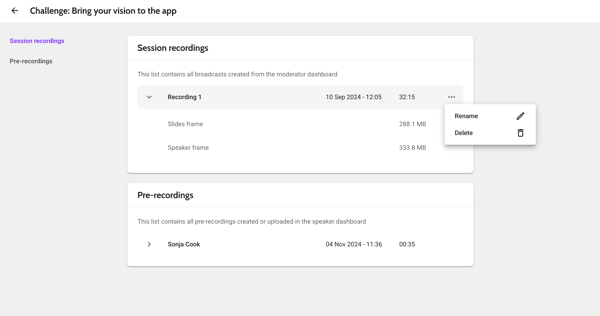
Each recording entry shows its date and time and total duration. Through the ... button next to it you can rename or delete the recording.
Click the chevron to expand a recording and see its individual tracks (Slides frame and Speaker frame) along with their file sizes. With the arrow next to these individual tracks, you can download the files as .mp4 to your device.
Documents & files
The Documents & files tab is a general-purpose library for any supporting files you want to store alongside your event, such as PDFs, spreadsheets, JSON files, or video files. The list displays the upload date, file name, and file size for each entry. The list can be sorted by name or by upload date.
To find its URL, click ... and choose Copy link. This copies the file URL to the clipboard.
Upload files
To upload a file, click Add file in the top right, select the file from your computer, and confirm.