Access the dashboard
If you have been added as a representative and have been granted permission to track your leads, you have received an invitation email with a link to the exhibitor dashboard. You can also access the dashboard through the web app.
Through the invite email
To access the dashboard, click the Open event link in the email invite you have received.

You will need to create an account using the same email address as the one on which you received the invitation email. If you already have created an account, you can just enter your email address and password to sign in.
When signed in, you will see a page containing the event description, and a list My exhibitor profiles that contains all profiles you are a representative of. You have additional rights for the institutions that are not disabled. Click the company name to access the dashboard.

Through the web app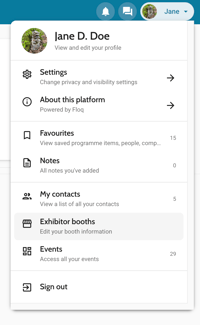
The exhibitor dashboard can also be accessed through the web app that is used during the event. Sign in with the account that has been invited. Then open your profile menu from the top right and choose Exhibitor booths. You will see a similar list as above, containing all exhibitors to which you have access.
Update your visibility and privacy settings
Once you are signed in, don't forget to check your Settings from the profile menu. We recommend you to be visible in the event attendee list and to allow new conversations and appointments, so that you can actively be contacted by attendees.

Get in touch with attendees
Attendees can get in touch with you through the company page or virtual exhibitor booth in the web app or mobile app. They can start a chat conversation or schedule a meeting.
You can also actively contact attendees through the attendee list or the company's public chat room (if enabled). Note that only the attendees that have enabled the above settings can be contacted privately.
Note that representatives have the same access to the app as attendees. However, if you are using Groups to restrict access to certain parts, those can be applied to representatives as well.
Scan QR codes of attendees
With the app, you can scan the virtual business card (or badge barcode, if set up) of other attendees. Open the profile menu from the top right and choose My contacts. The scanner can be opened from the Scan a card tab. Your own virtual business card can be found on the My card tab.

Anyone you scan with this in-app scanner, will be added to the My contacts page and can then be found in the Scanned section. Optionally, you can send them a contact request.

Create notes
On the profile page of an attendee, you can add a note to an attendee with the button right next to Connect. This note can be used to add a quick text about how you met this attendee, his or her background or interests, or anything else you want to remember.
All notes can be found back in your profile > My notes. They can be exported from there as well. They can also be found in the exhibitor dashboard (see below), and in the export you can create from there. Please note that you can not only see your own, but also other representatives' notes in this export.
View your leads on the dashboard
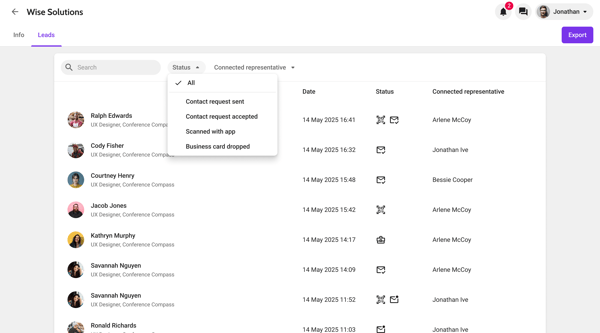
On the Leads tab, you can see a list of leads of all representatives of the same company. This list contains the following attendees:
- Attendees that you or another representative of your company have scanned with the in-app QR code scanner. This scanner can be found in the My contacts page
- Attendees or another representative of your company you have sent a contact request. This request can be sent after viewing a profile in the app, for example by accessing from the attendee list or by scanning another attendee's QR code.
- Confirmed contacts, that have accepted your contact request or that of another representative of your company.
- Attendees that dropped their business card in your booth.
The table is sorted by date: the most recent connection is at the top of the list. For every attendee, you can see the connected representative. In case an attendee connected to multiple representatives, he or she can be found twice in the table.
Export leads
From the dashboard, you can create an Excel import of all leads with the Export button at the top right. This export contains any information that the attendee has filled in in its profile, such as the email address, company, country or social links. Additionally, any notes you or another representative has created are exported too.
Note that you will see the contact details of scanned leads and of confirmed contacts as they have given consent to share their information by allowing to be scanned or accepting a request. For this reason, you do not see the contact details of unconfirmed contacts.