This article explains about the keys that are necessary to integrate Google Sign-in with the app.
In order to integrate the Google Sign-in feature to the app, you must link it to a Firebase project. This process can be divided in two parts: setting up the app on Firebase and adding the keys to the app while building it.
Setting up a new app on Firebase
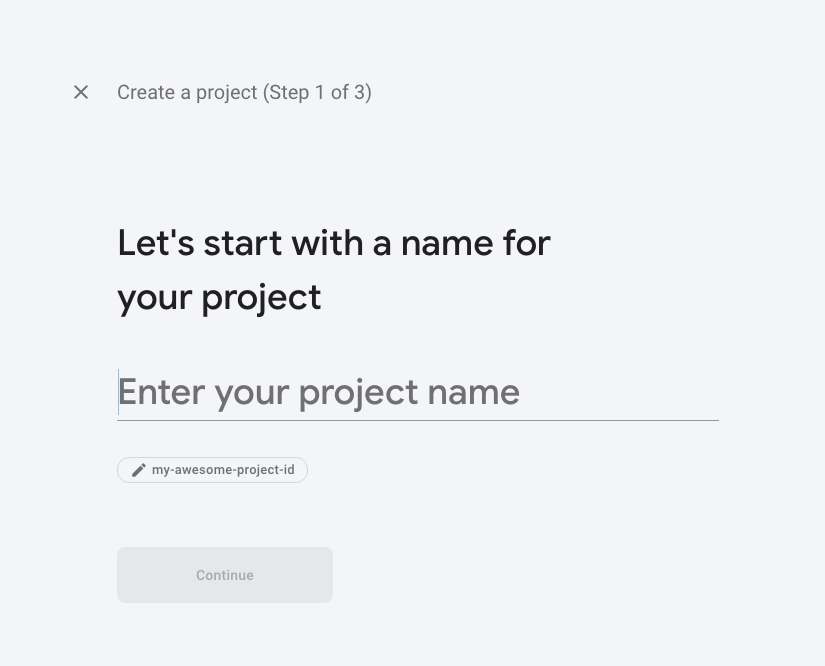
Navigate to Firebase Console and log in with your Google account. Click Add Project, enter the app name and click on Continue. The Project ID will be generated automatically.
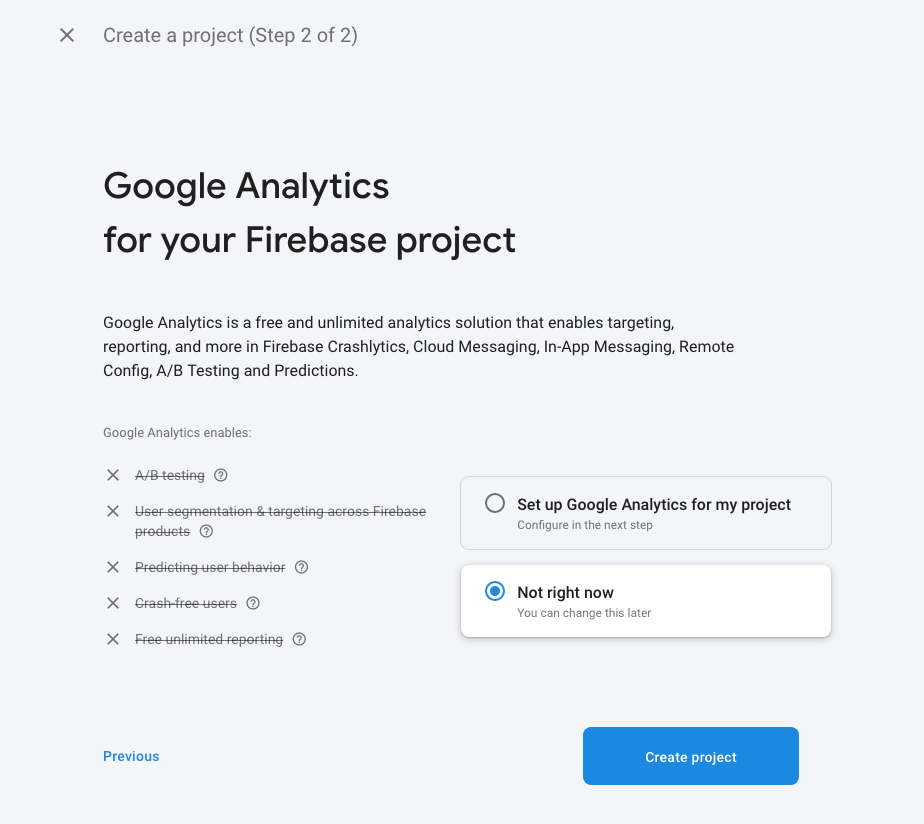
On the next page you can select Not right now, and then Create Project.
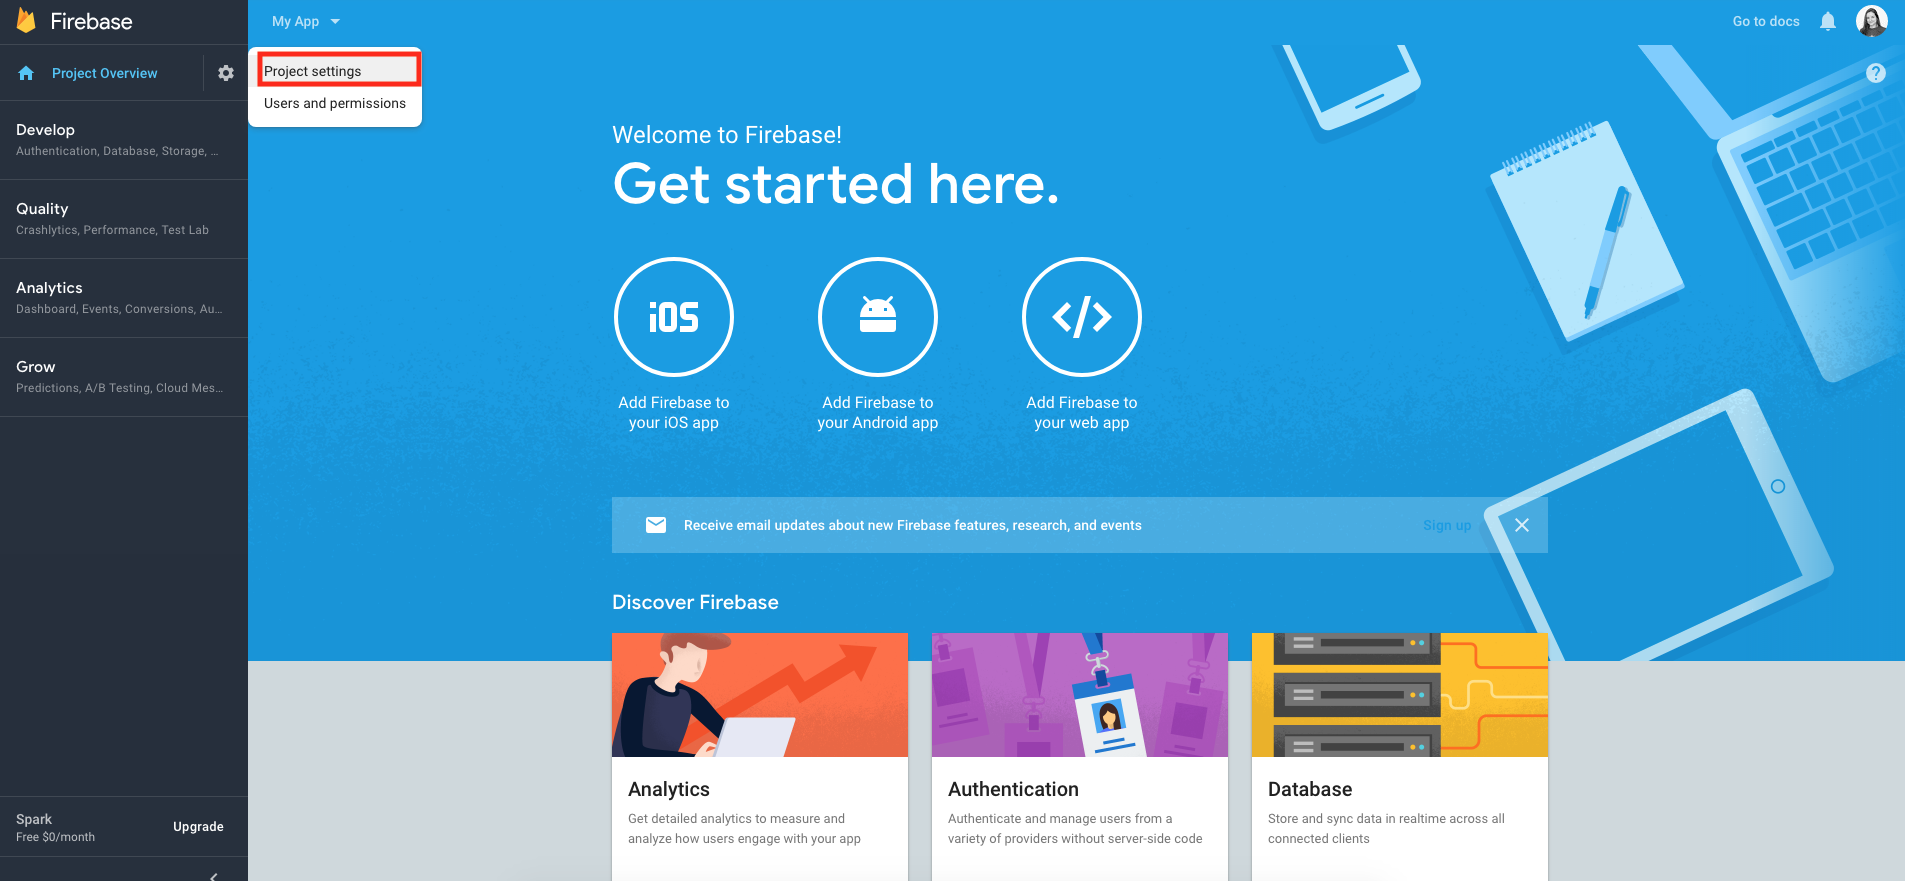
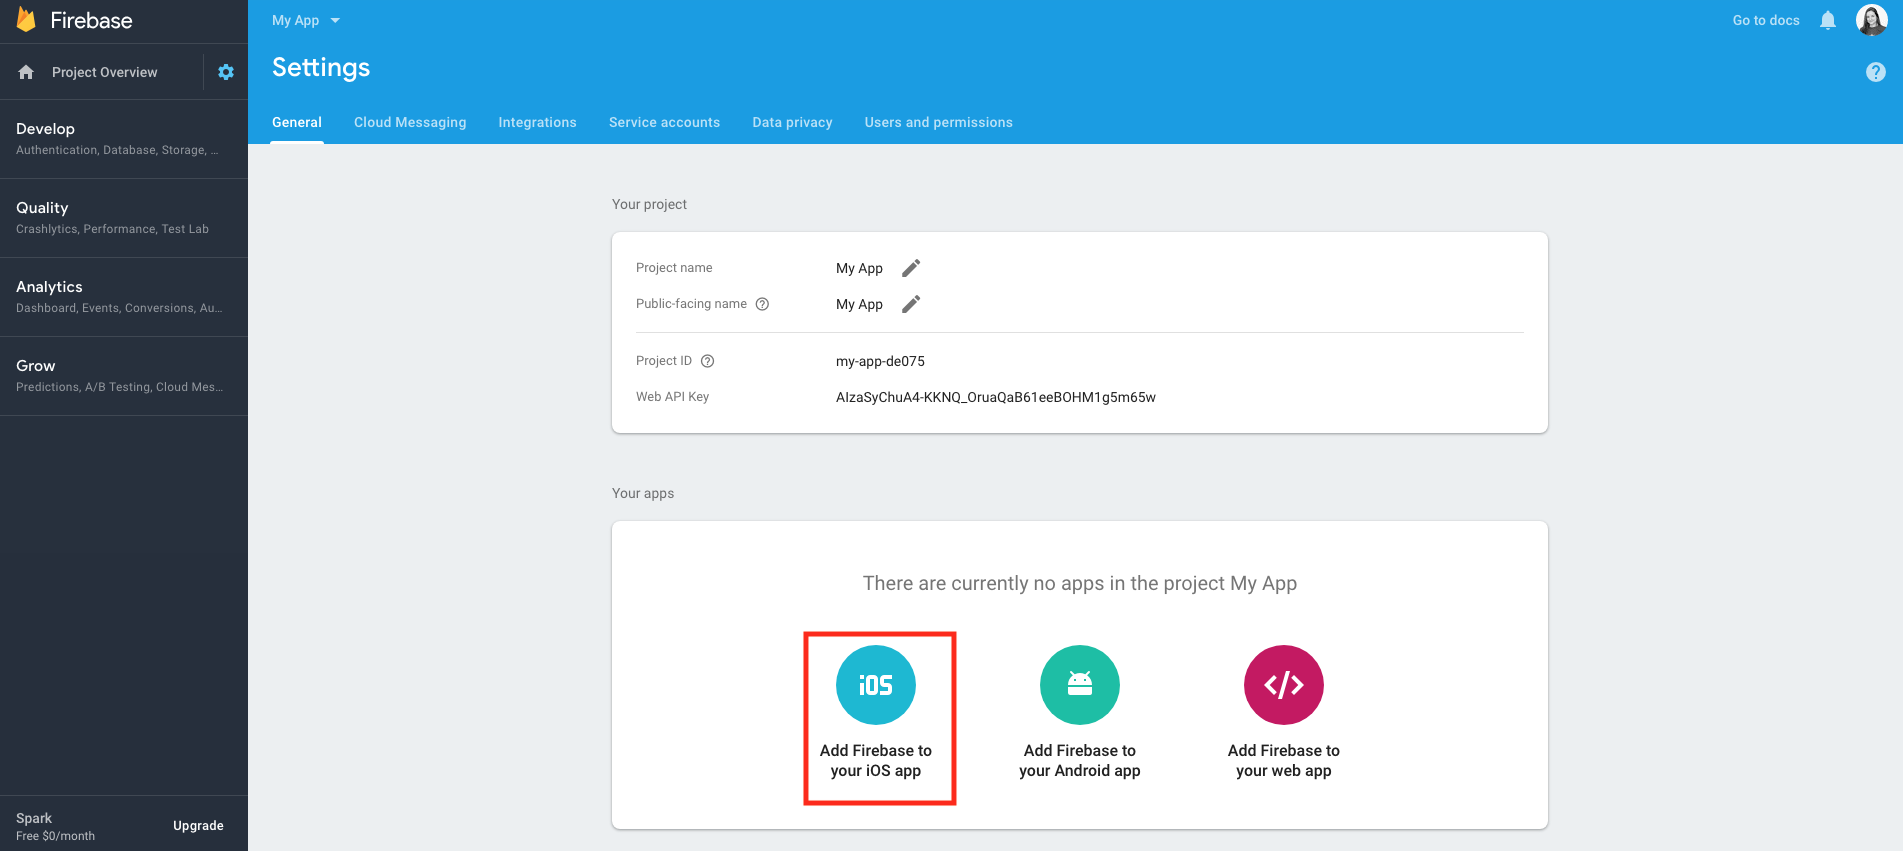
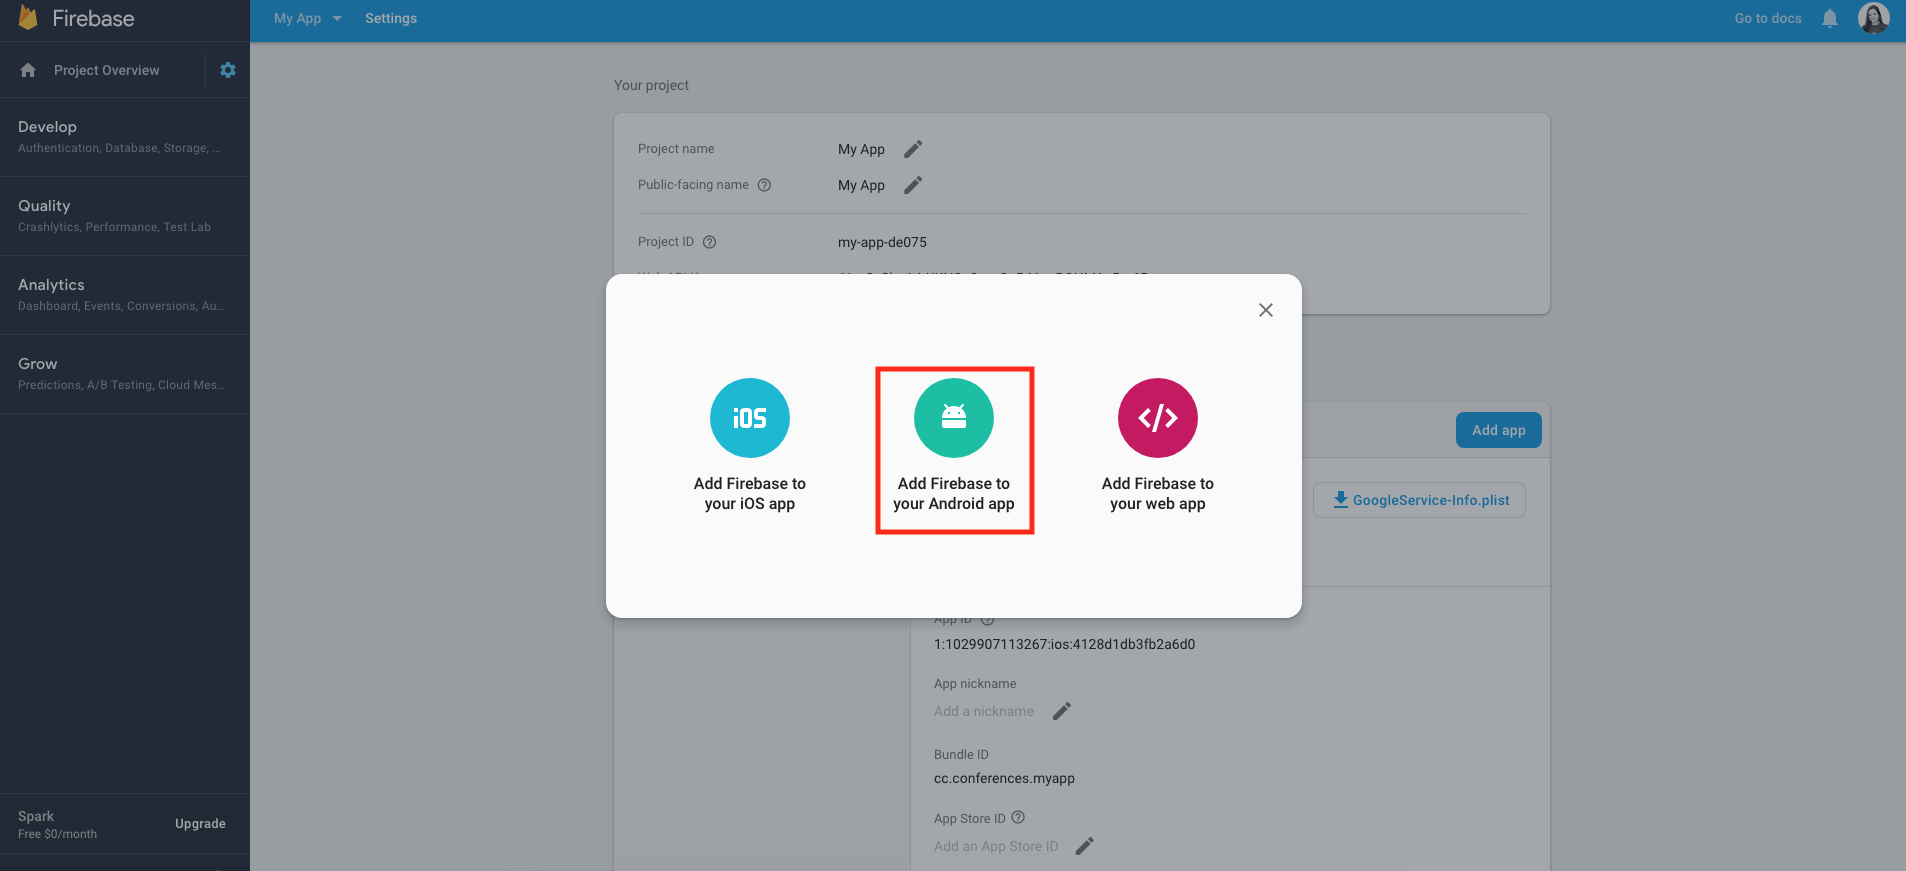
On the project page, you will be able to add Firebase to the iOS and Android app. Navigate to the Project settings by clicking the settings icon in the left menu.
Change app name
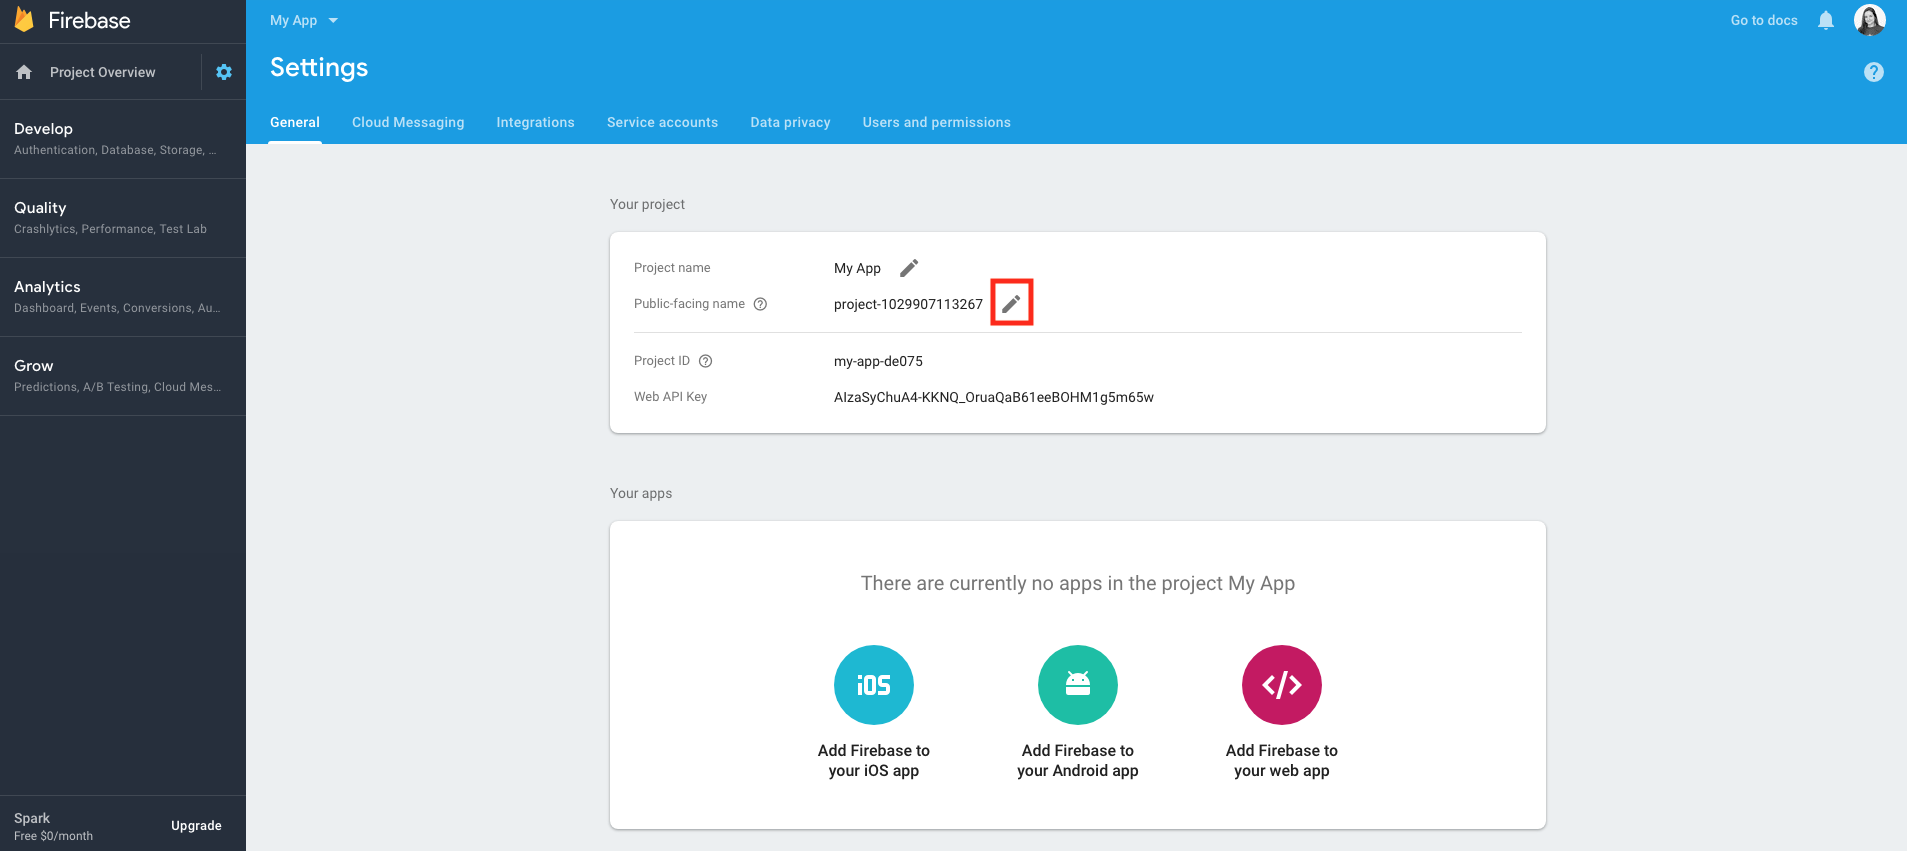
In the Settings, check the Public-facing name of your app. This name will appear when the Google Sign-in feature asks the user's credentials. You can change it by clicking the Edit button.
Adding Firebase to your iOS app
For the iOS app, you will only need to register the app. At Project Settings, select Add Firebase to your iOS App.
To do so, simply enter the store bundle ID, created while creating the store certificates, in the field iOS Bundle ID.
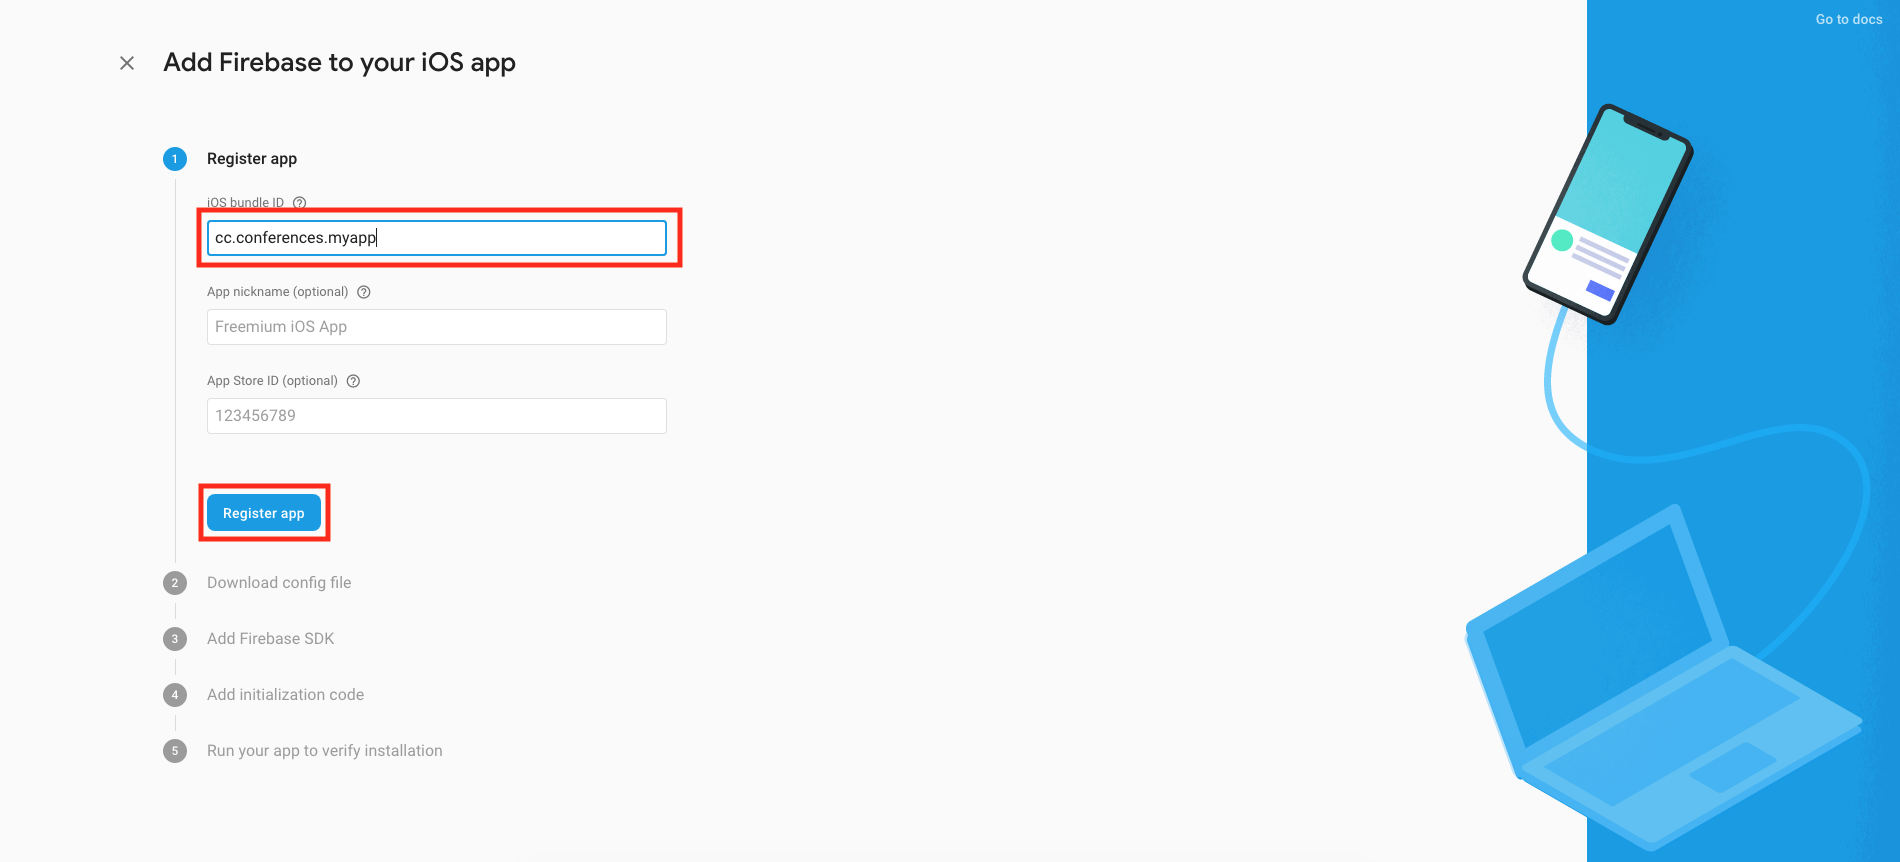
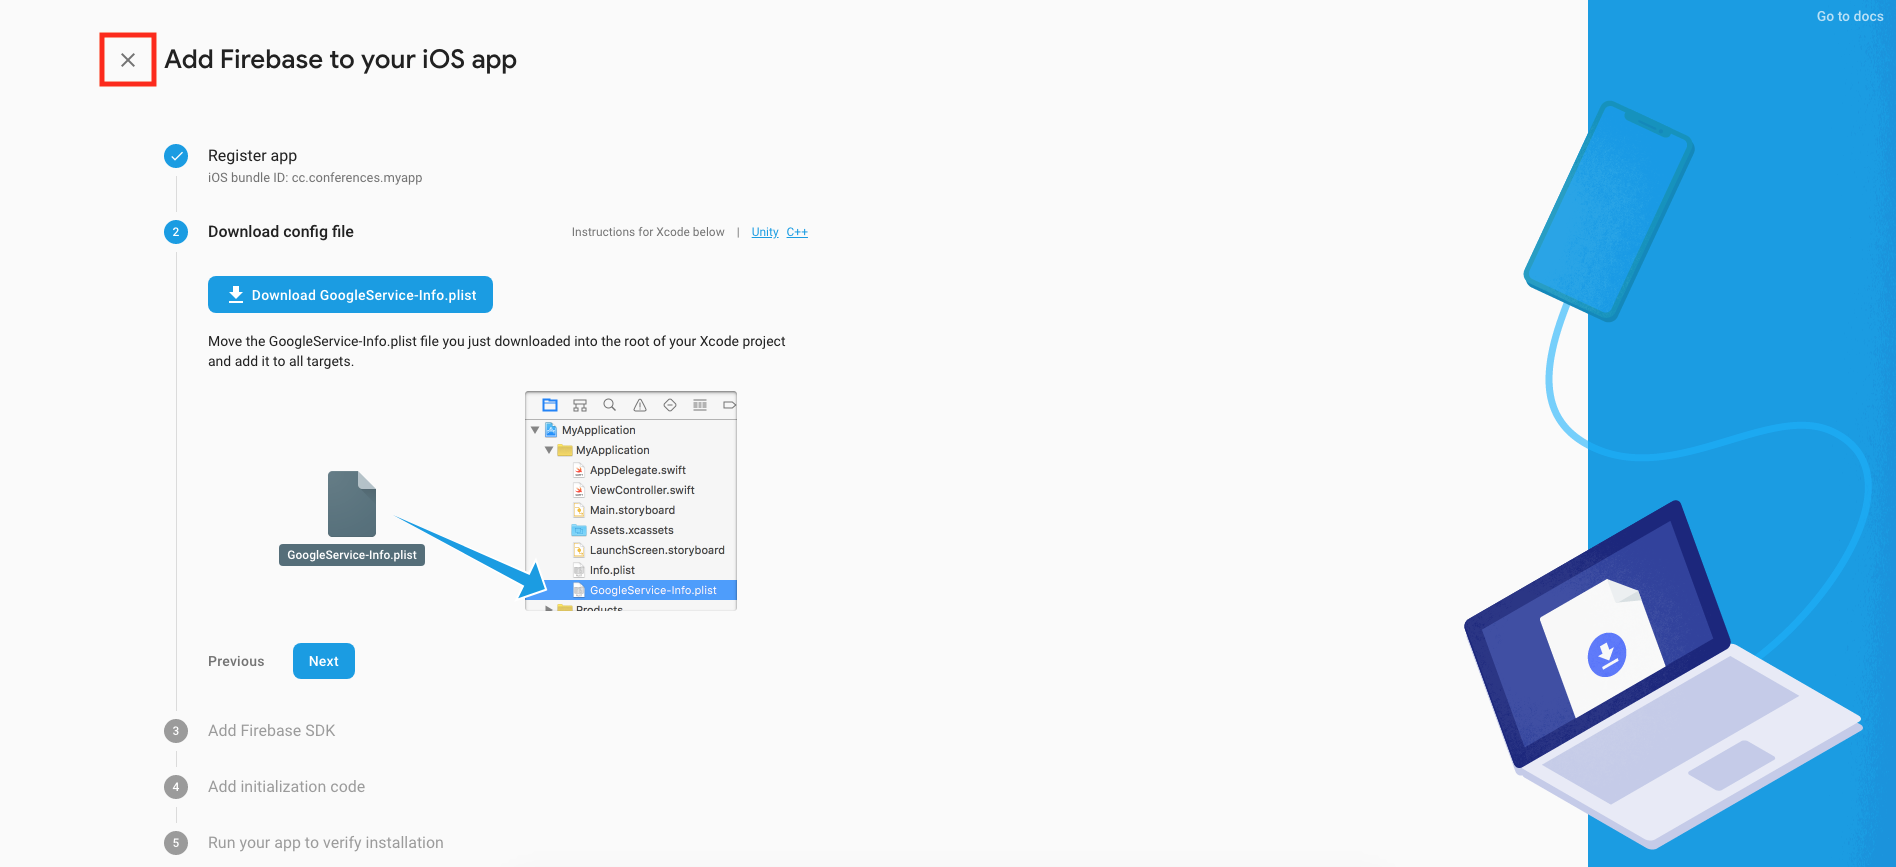
Click Register App. In the next step, click the cross at the top left of the page to close it and to go back to the console.
Adding Firebase to your Android app
Now that you have a list of your apps, a new Add App button in the top-right corner should be available.
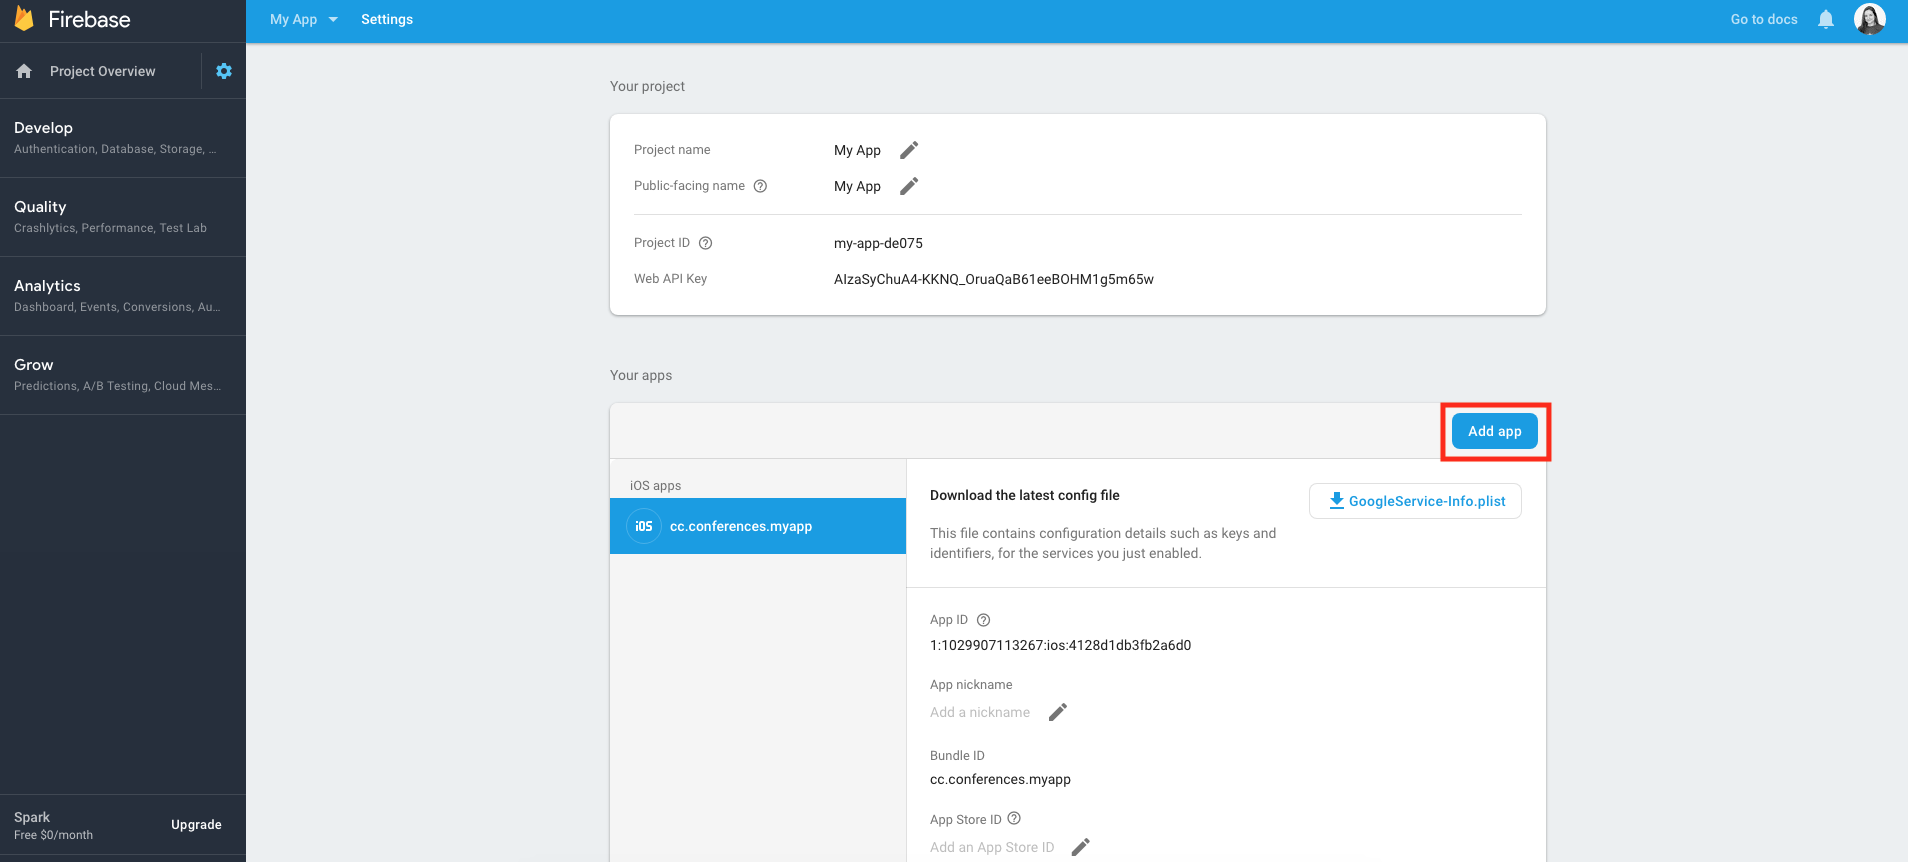
Click it to see the options for the creation and select Add Firebase to your Android app.
Use the store bundle ID created while creating the store certificates in the field Android package name.
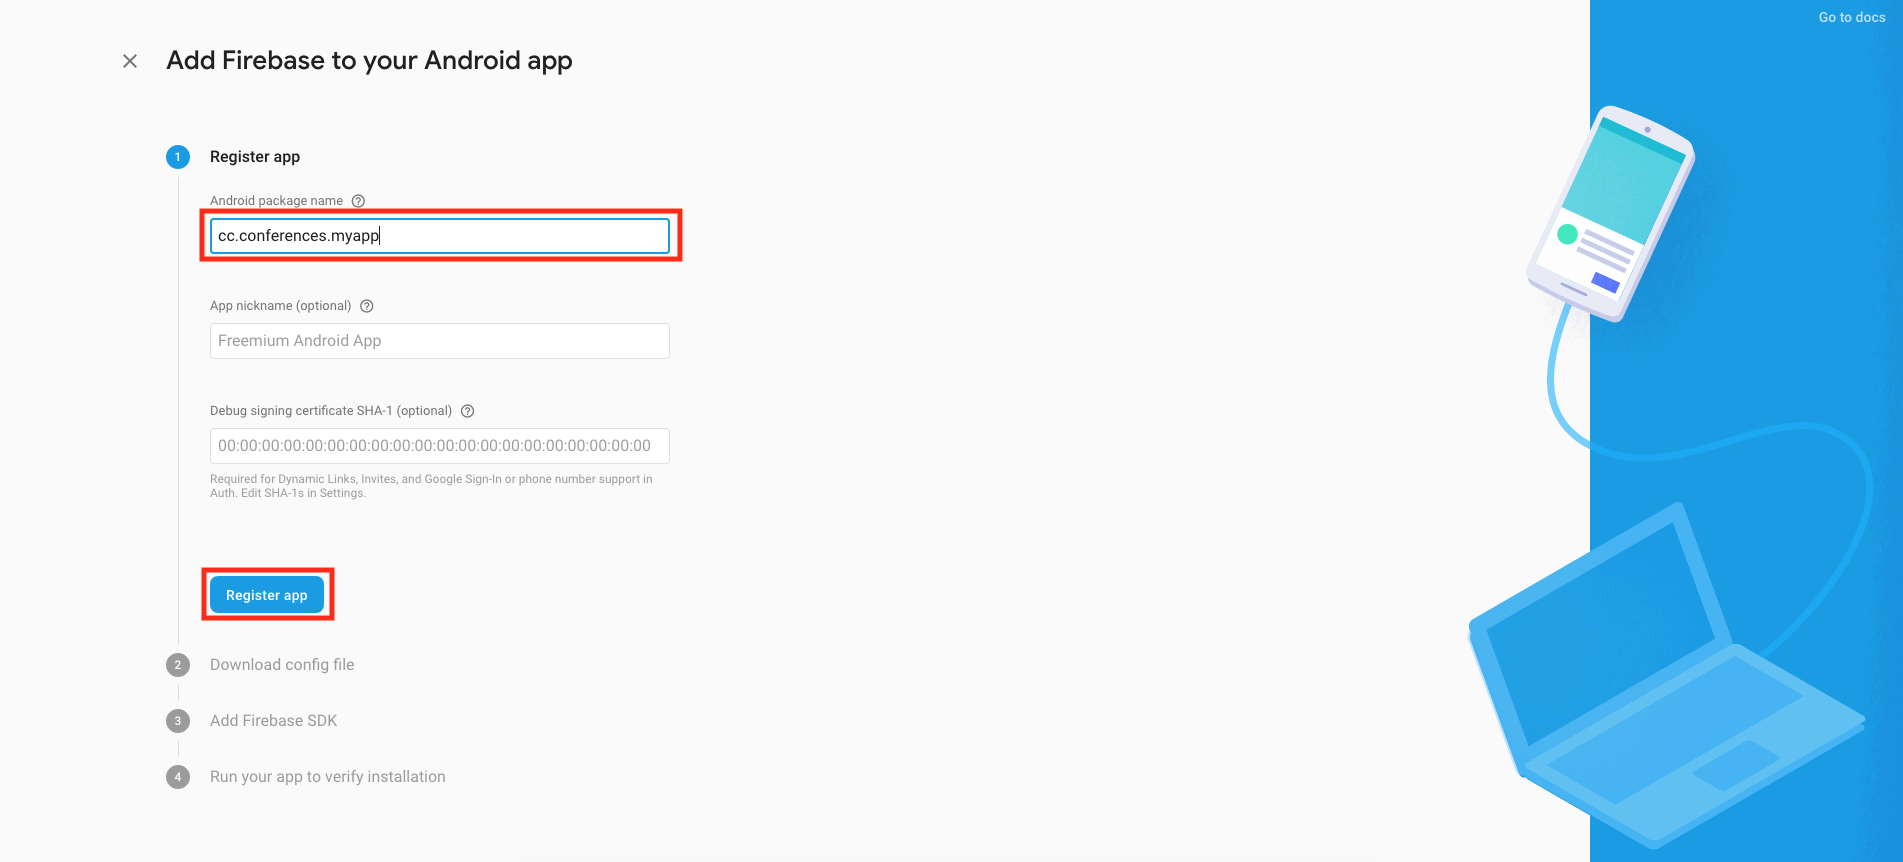
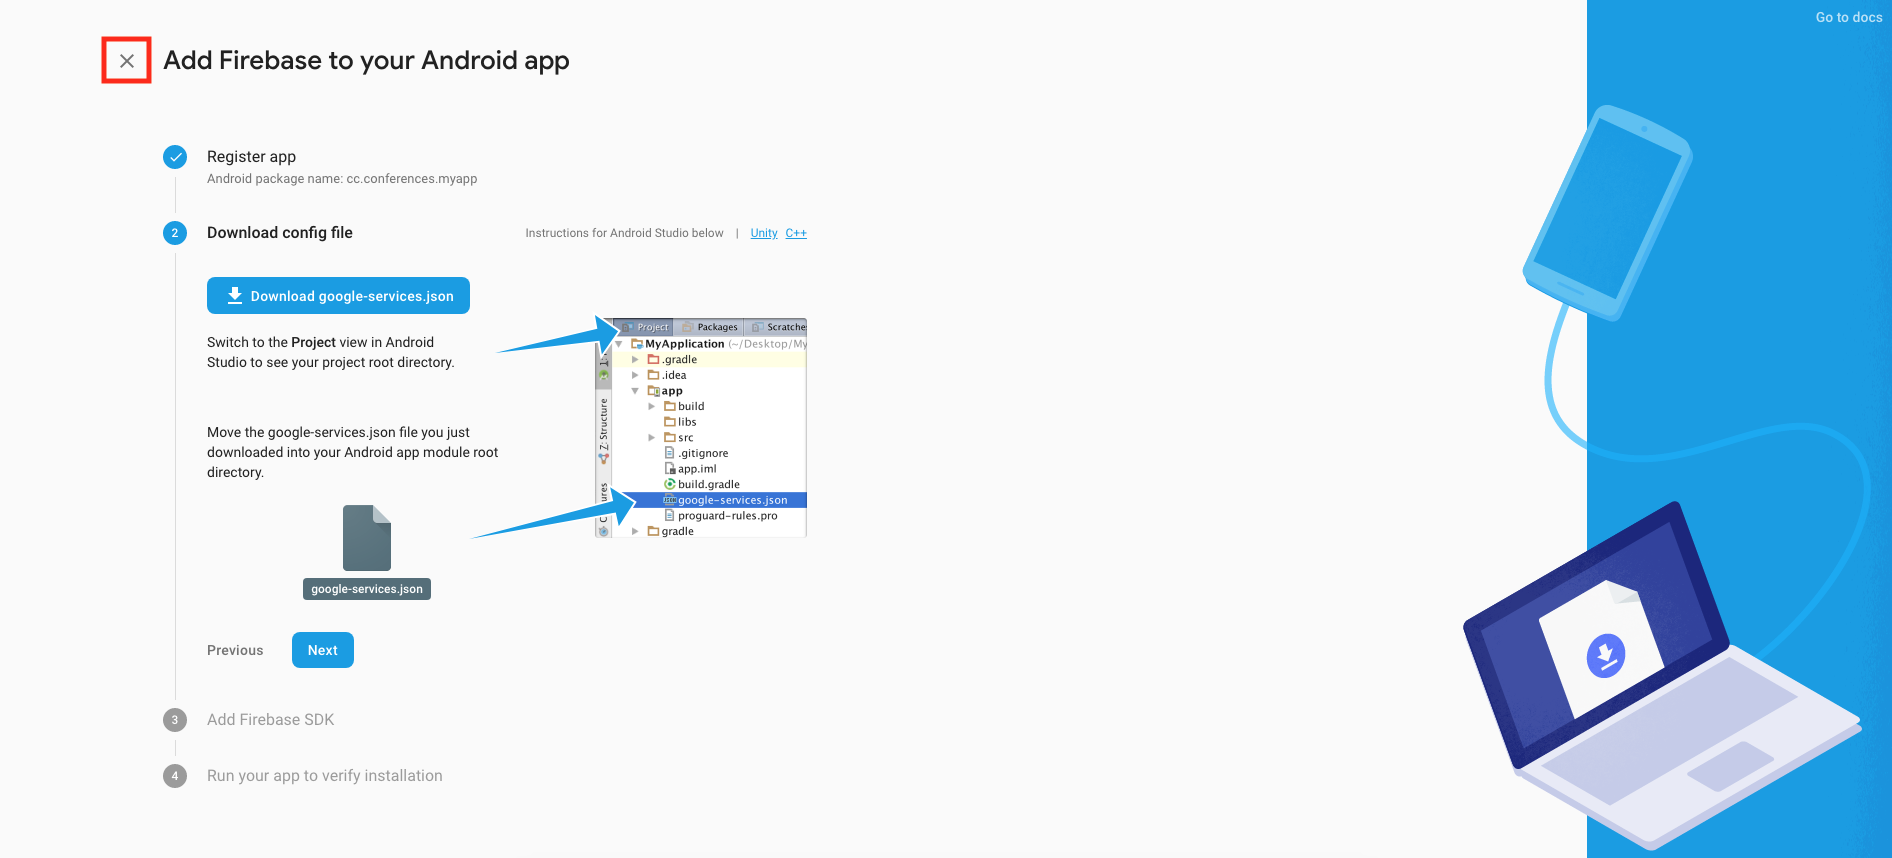
Click Register App. In the next step, click the cross at the top left of the page to close it and to go back to the console.
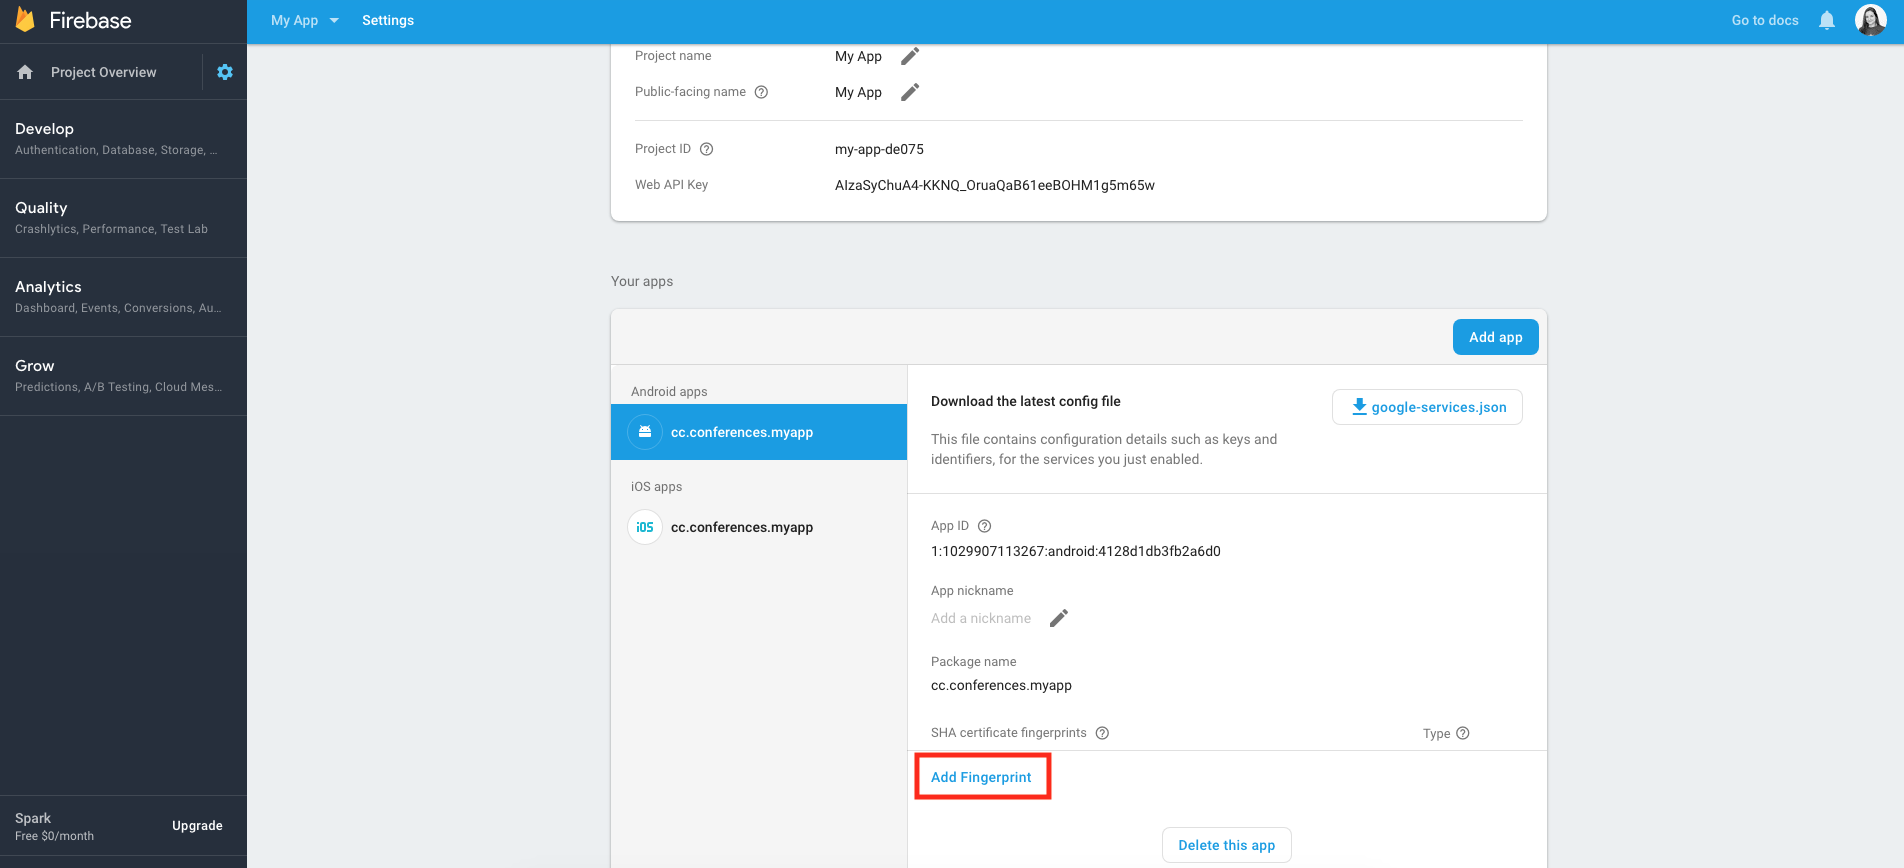
Select the Android app from the list and click Add fingerprints. You should have received one Android Store Key that should be included in this step. If not, please contact us. After adding both fingerprints the set up is completed.
Google Login keys for building the app
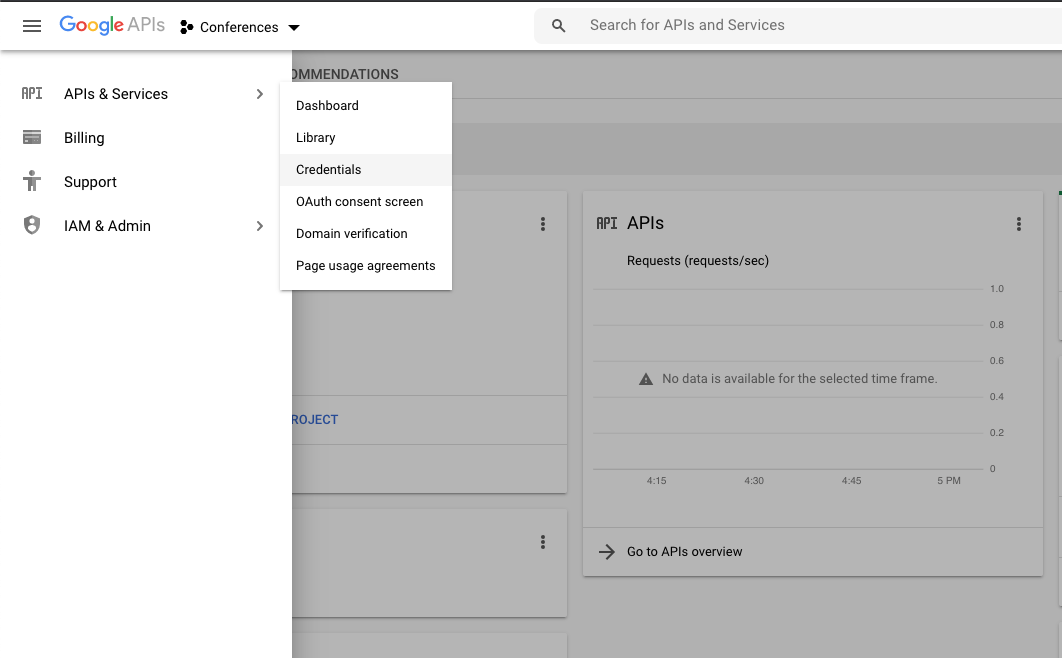
Navigate to the Google Developer Console APIs and select the app from the dropdown in the top bar. From the menu on the left, select APIs & Services and then Credentials.
Under the section OAuth 2.0 client IDs you will find the two keys that are needed to build the app:
-
iOS client
-
Web client
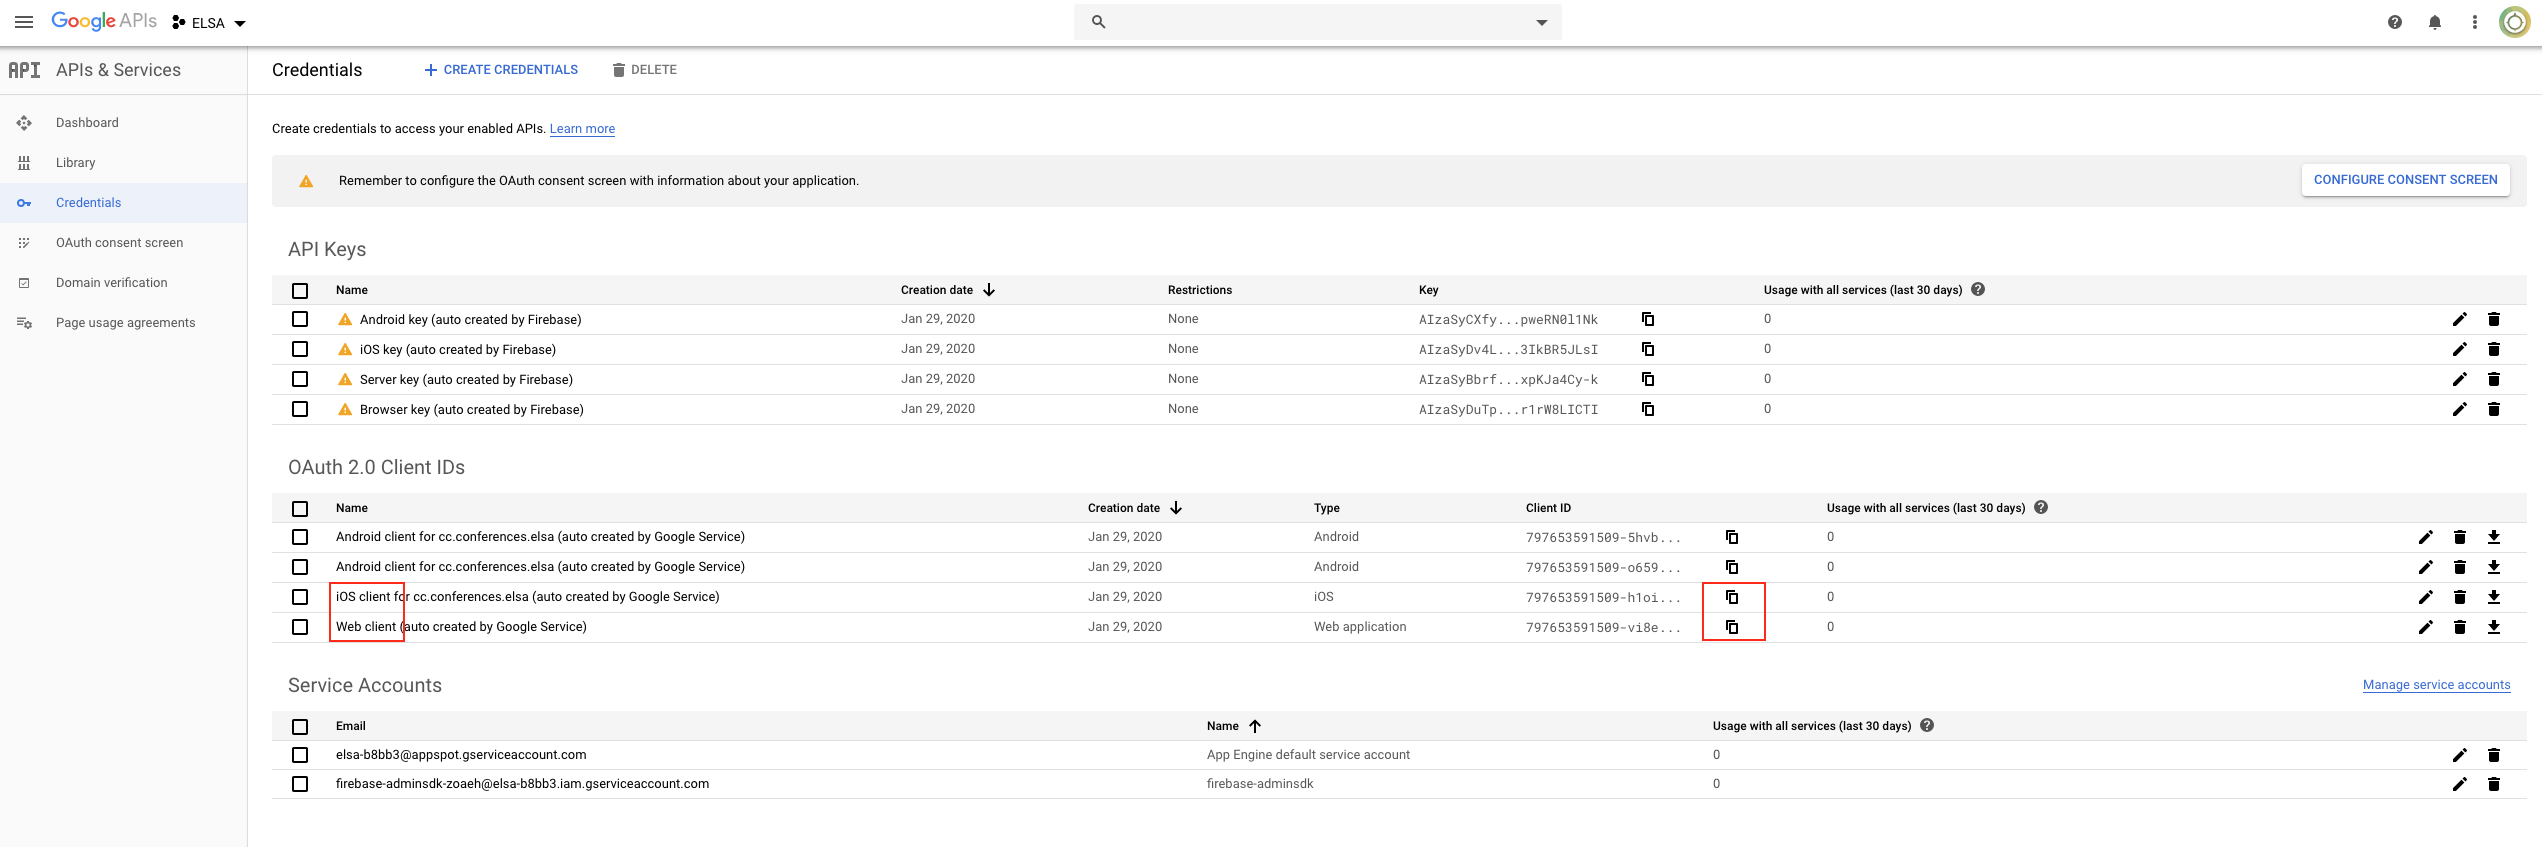
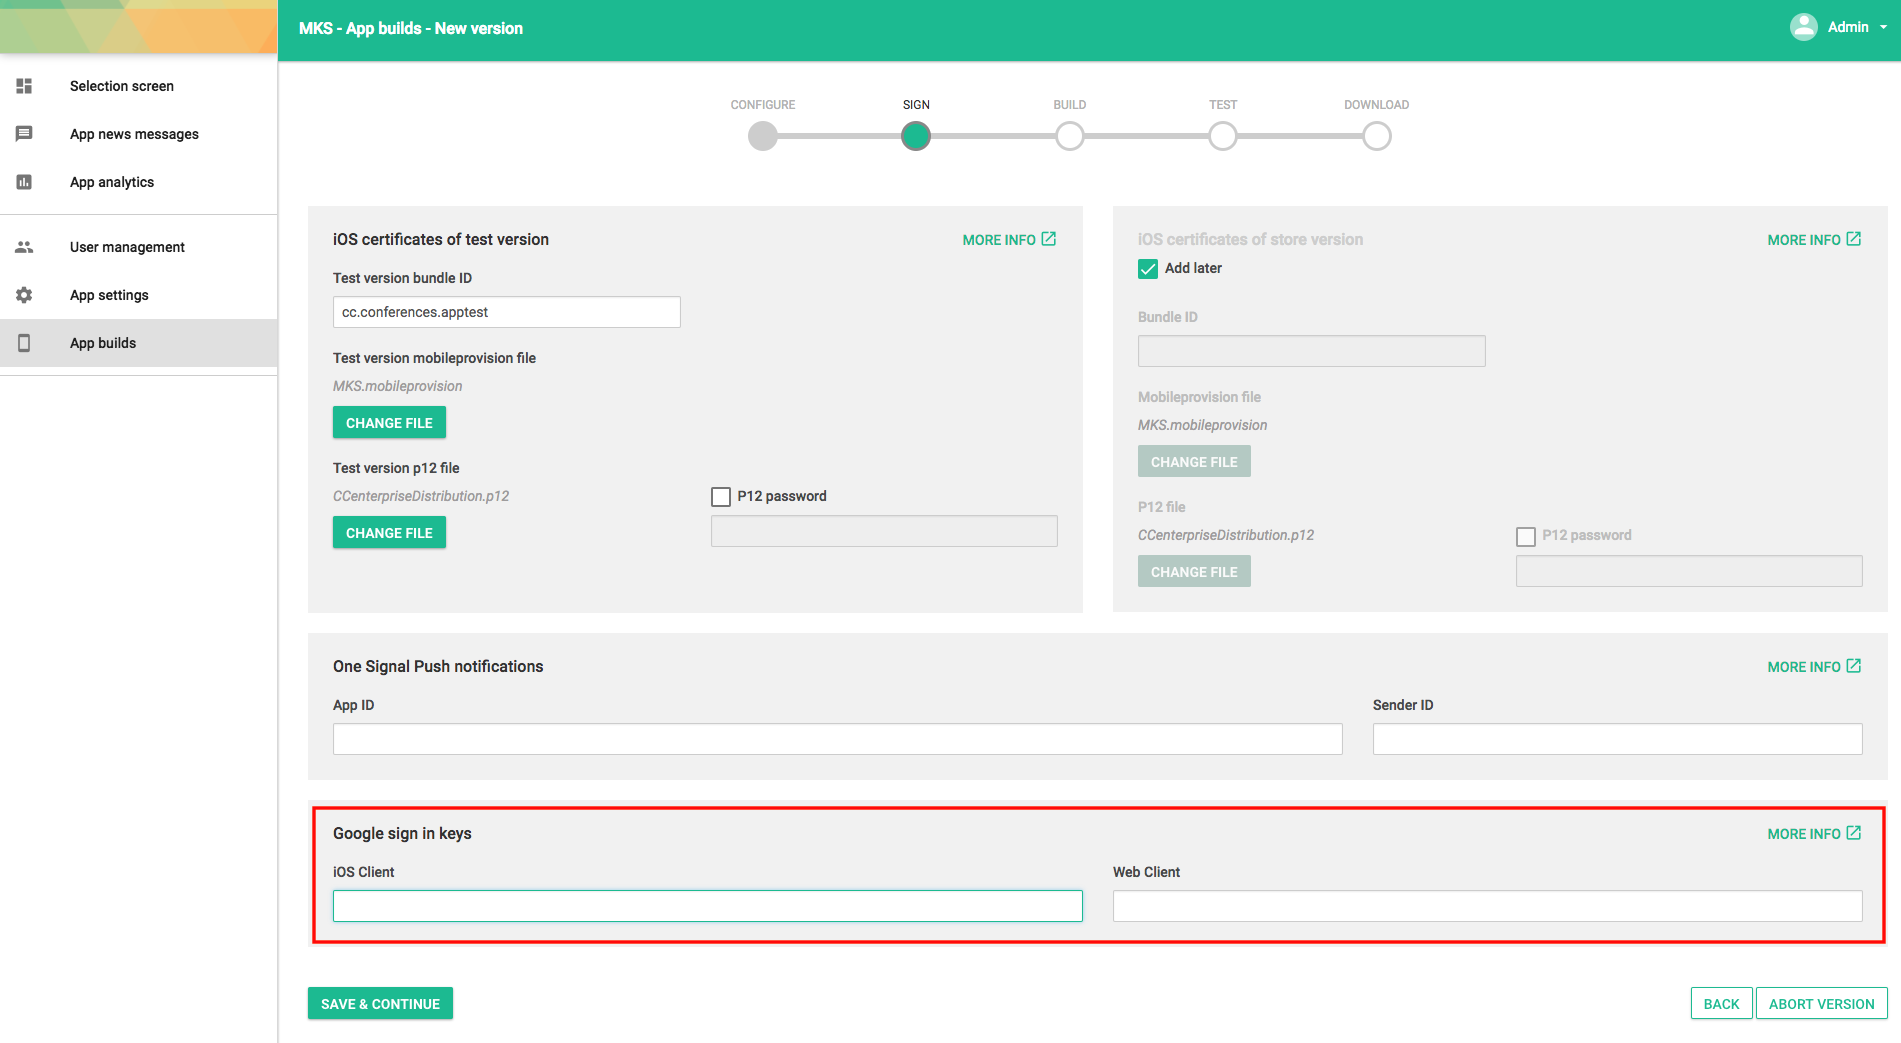
Copy the Client ID from both entries, iOS and Web client, by clicking on the copy icons and enter them on the signing step while building the app from the configurator.
Setting up the OAuth consent screen
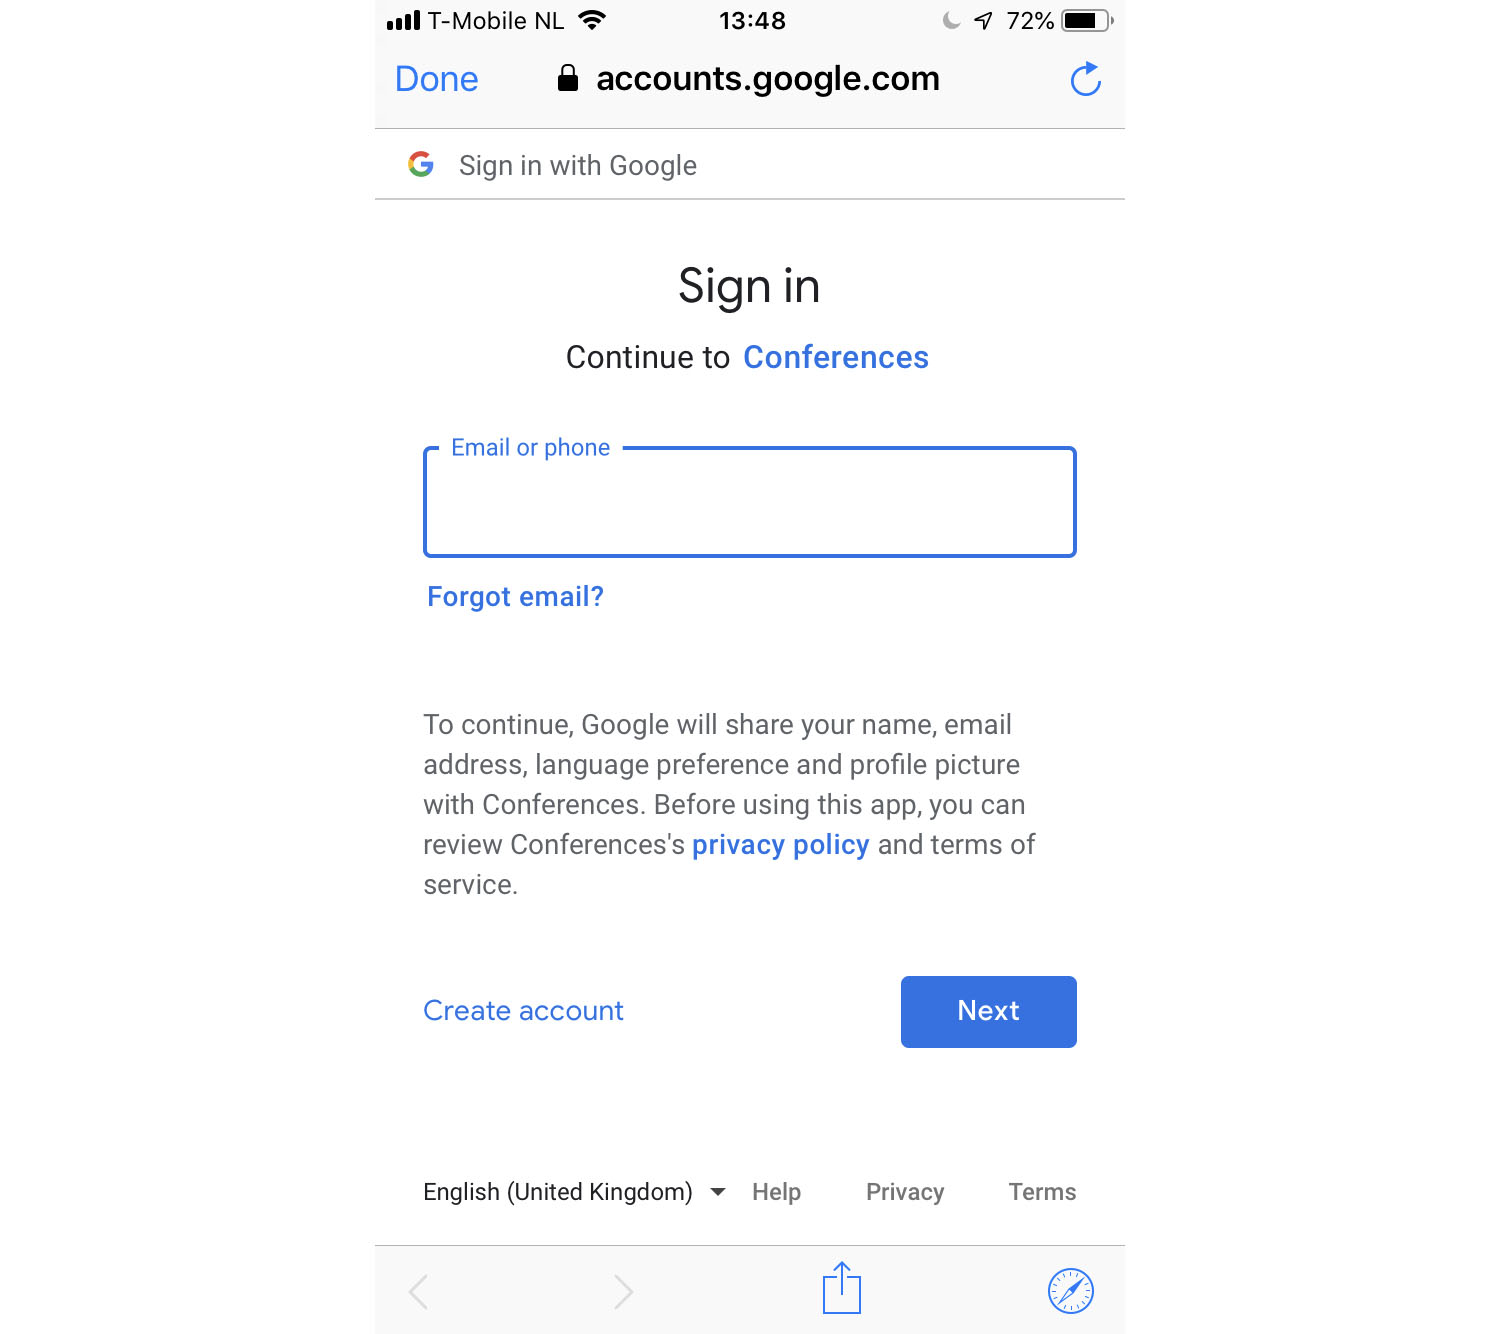
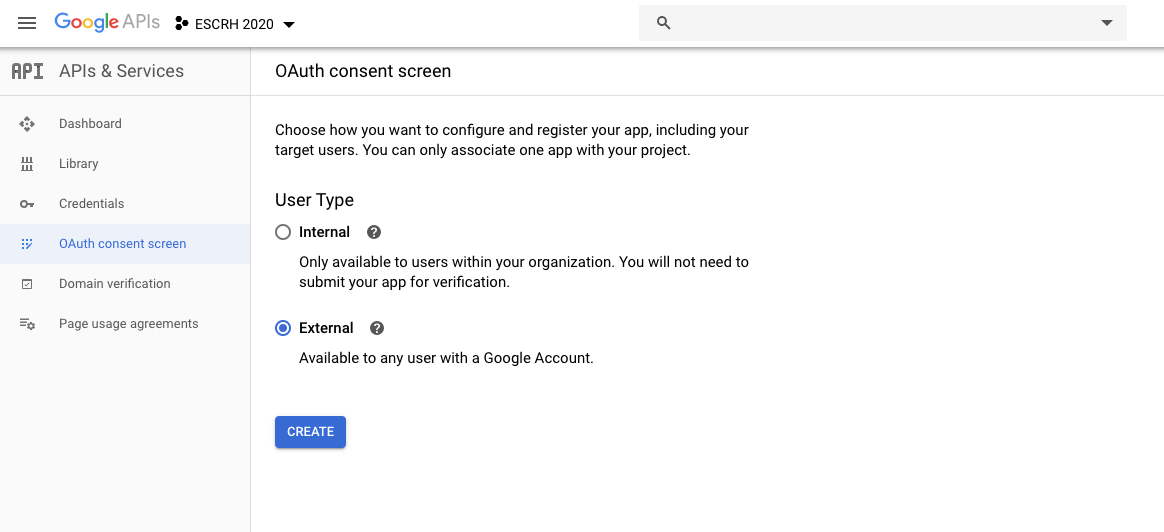
Before leaving the Google Console website, set up the OAuth consent screen. This screen will allow users to choose whether they want to grant you access to their private data, as well as give them a link to your terms of service and privacy policy. It is shown in the Google Sign In page before a user logs in.
Click the tab OAuth consent screen and select User Type External, then click on Create:
On the next page you'll configure the oAuth consent screen, choose the following values:
-
Application type: Public
-
Application name: filled in automatically (the Public-facing name)
-
Support email: filled in automatically (the account email address)
-
Authorized domains: add the conference website domain and also the conferencecompass.com domain
-
Application Homepage link: the complete URL of your conference website
-
Application Privacy Policy link: https://www.conferencecompass.com/privacy
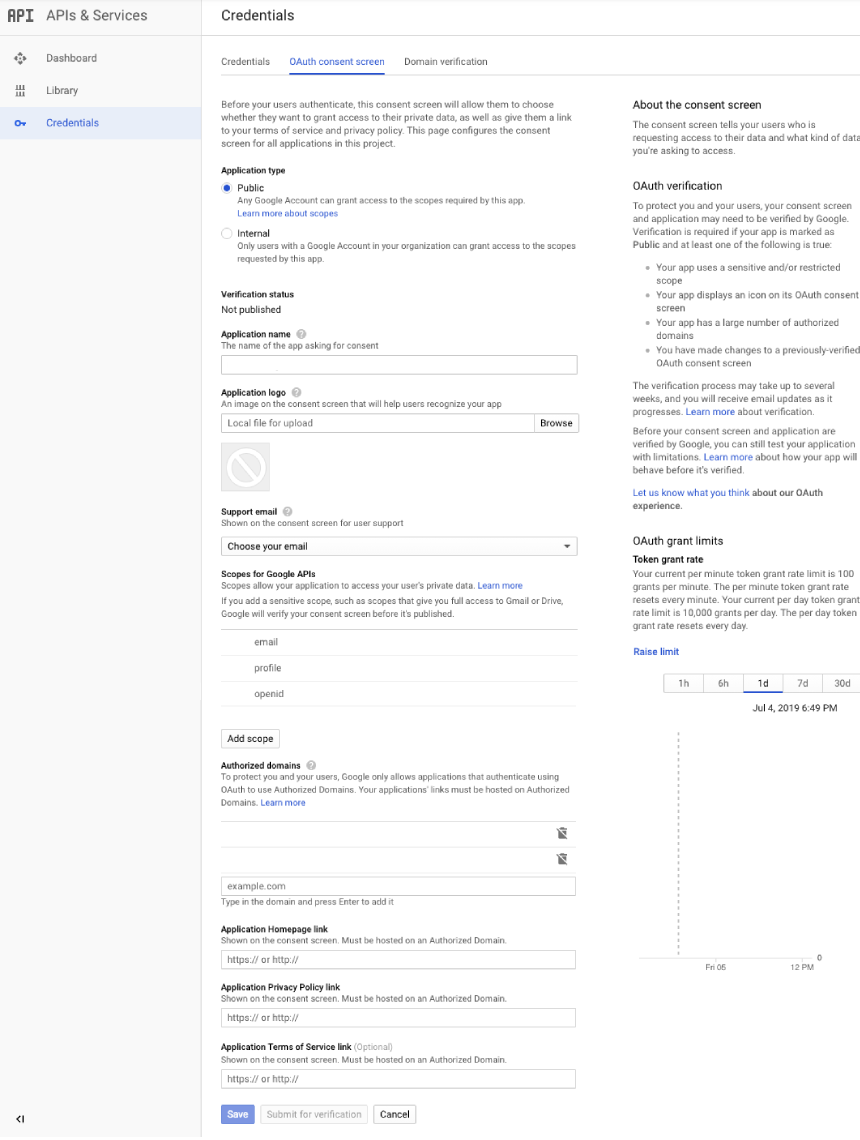
Click Save to process your changes.