![]()
Name
Choose the name of your event that will be displayed on your event website homepage as well as in all your communications with your customers/attendees.
URL
The URL address will be the direct link to your event website page. By default, the end of the URL is named after the name of the event. This can be edited any time.
Tip: If you change the name of your event after you already clicked out of the Name field, the change won’t be simultaneously done in the URL. Be sure to adapt it if you want it to match the name of your event.
Language
Select the main language of your event website and registration form. You will have the possibility to add other languages afterward.
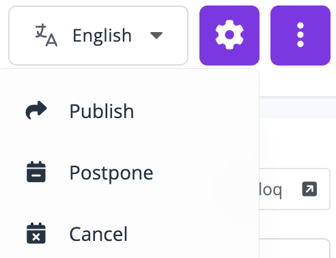
Event status
The status of a newly created event is always set to Offline by default. To update the status of your event, click on the more actions button at the top right of the screen and choose if you want to Publish, Postpone, Cancel, Duplicate or Cancel your event.
Basics
Define the basic information of your event.
Easy access to your event website
You can easily access to your event website at any time by simply clicking on the button next to your event's name at the top of the screen. It is particularly helpful to see in real time the changes made on the website.

Organizer
The organizer name is by default named after your Account Information Name in your Profile, but it can be adapted according to your preferences. The name will be displayed at the bottom of your homepage. It will also be used as email sender name and mentioned in the confirmation emails and tickets sent out to your attendees.
Date
You can choose to create a permanent event (without a start or an end date). In this case, simply untoggle the Define your event date button.
You can as well define precisely when your event will take place. Enter a start date and an end date from the calendar. These dates will be displayed on your event website and in confirmation emails, with export possibilities to your favorite calendar tools.

Toogle the button Define a registration period if you want to define a registering period, which is the period during which registrants can register. You can enter a start date and an end date from the calendar and specify the exact opening and closing hours as well.
If Define a registering period is left untoggled, by default the registrations will stay open until the event start date.
Regional settings
The date and currency format will automatically be defined according to the selected region.
Main location
Depending on the type of event you are organizing, you can set your main location as physical or online. In their confirmation emails, attendees will be able to directly add the event to their calendars (Google, iCal, Outlook and Yahoo), with all related information.
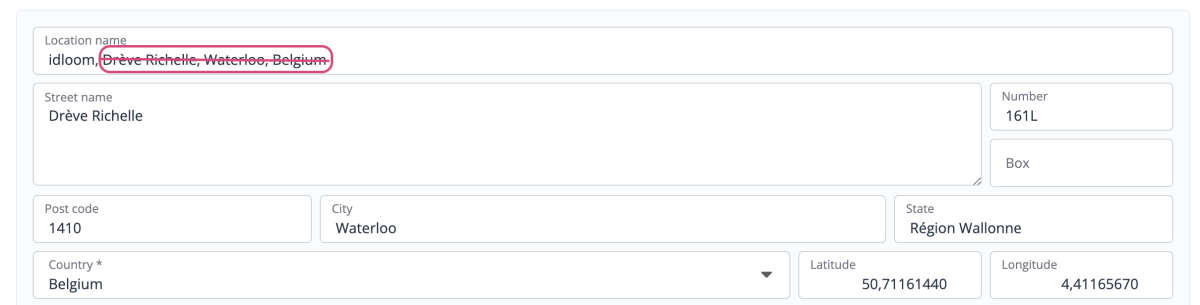
- Physical location
When entering the location name, the address and coordinates are automatically filled in by Google Maps. At this stage, make sure to delete the address in the upper field otherwise it will be displayed twice.
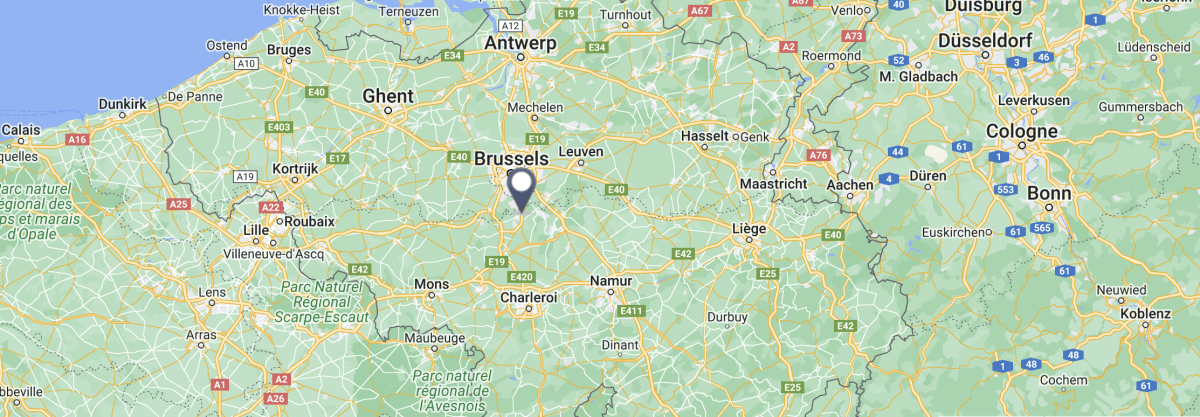
A Google Maps plan is automatically displayed on your homepage. By default, it is set on zoom 8, but the map zoom can be adjusted as per your preferences in Content > Website > Display options > Display main location.
The physical location will also be mentioned in the confirmation emails, tickets, documents and invoices sent out to your attendees. If you prefer to hide the physical location, simply untoggle the Display main location button in Content > Website > Display options.
- Online location
Enter your location URL. It can be from any conferencing platform you want, whether you prefer to use Zoom, Cisco Webex, Microsoft Teams, Whereby, or any other one.
Make sure to select the proper event time zone, especially for international events and fill the country in.
The online location URL will never appear anywhere other than in your Event Manager. In their confirmation email, your attendees will get a link named “Join online event”. By clicking on it, they will be redirected to a countdown page on your event website until your event starts.
Once the countdown is over, the page automatically refreshes and attendees will be redirected to the online location you have chosen. If the attendee cancels or gets rejected by the organizer, he will not be able to access the meeting. This feature has been developed to make sure only registered attendees can access the online location.
In your Event Manager, event registration records a check-in for each attendee that has accessed the online event, as it would be the case with a physical event. All check-ins will be seen in the statistics dashboard and can be exported.
For an online location, make sure you provide the full URL.

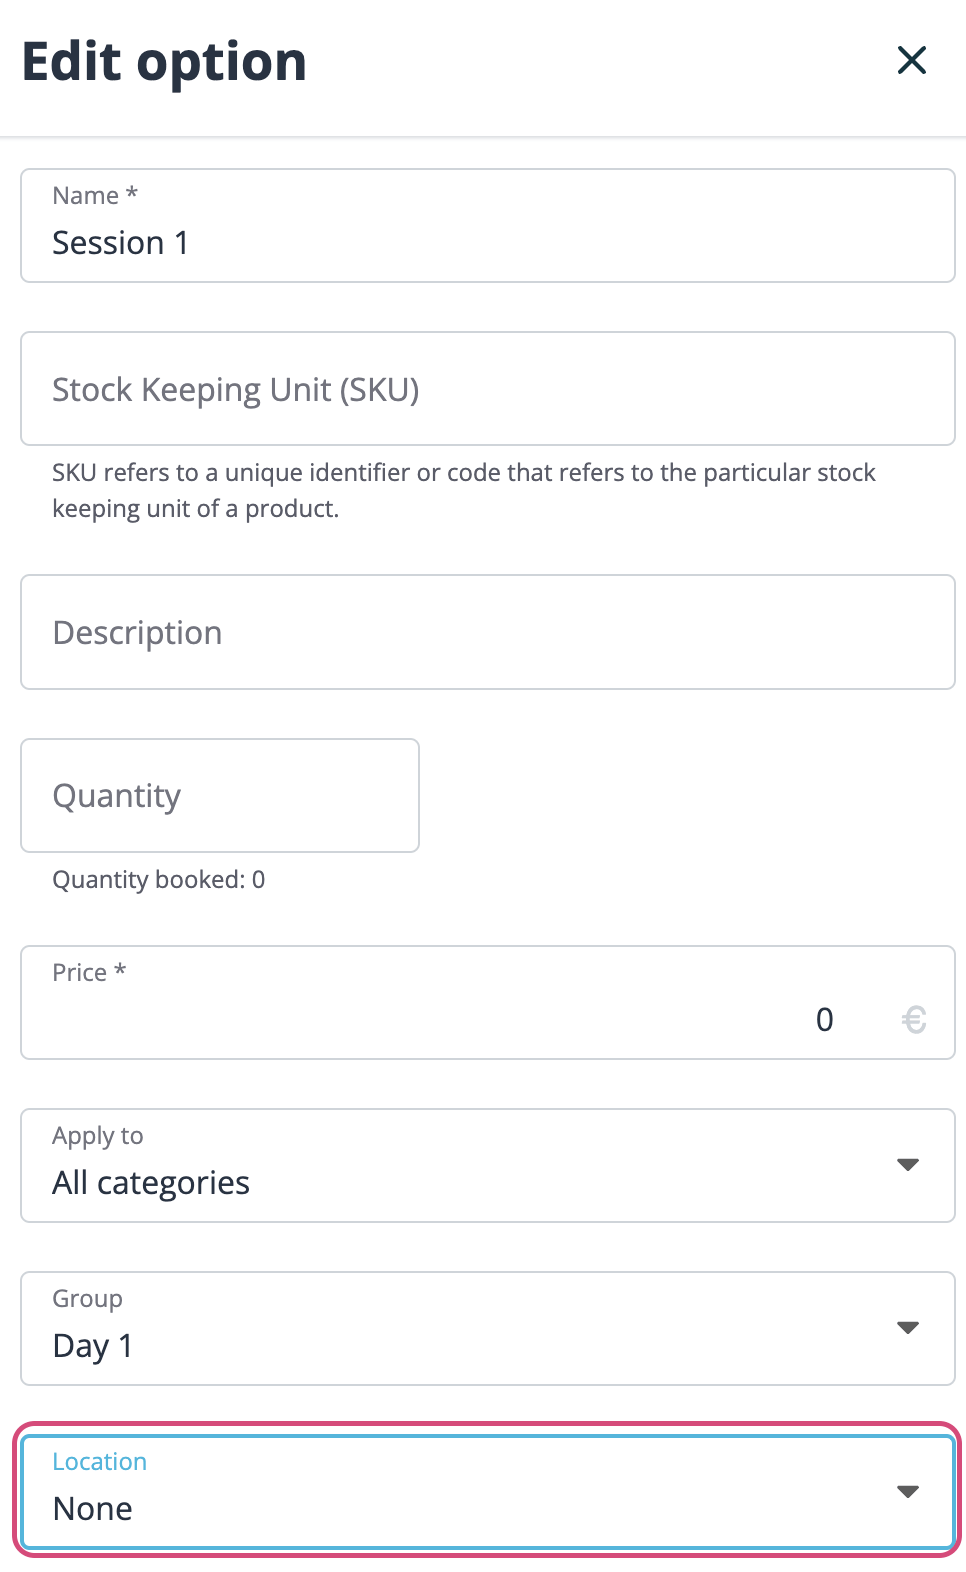
Additional locations
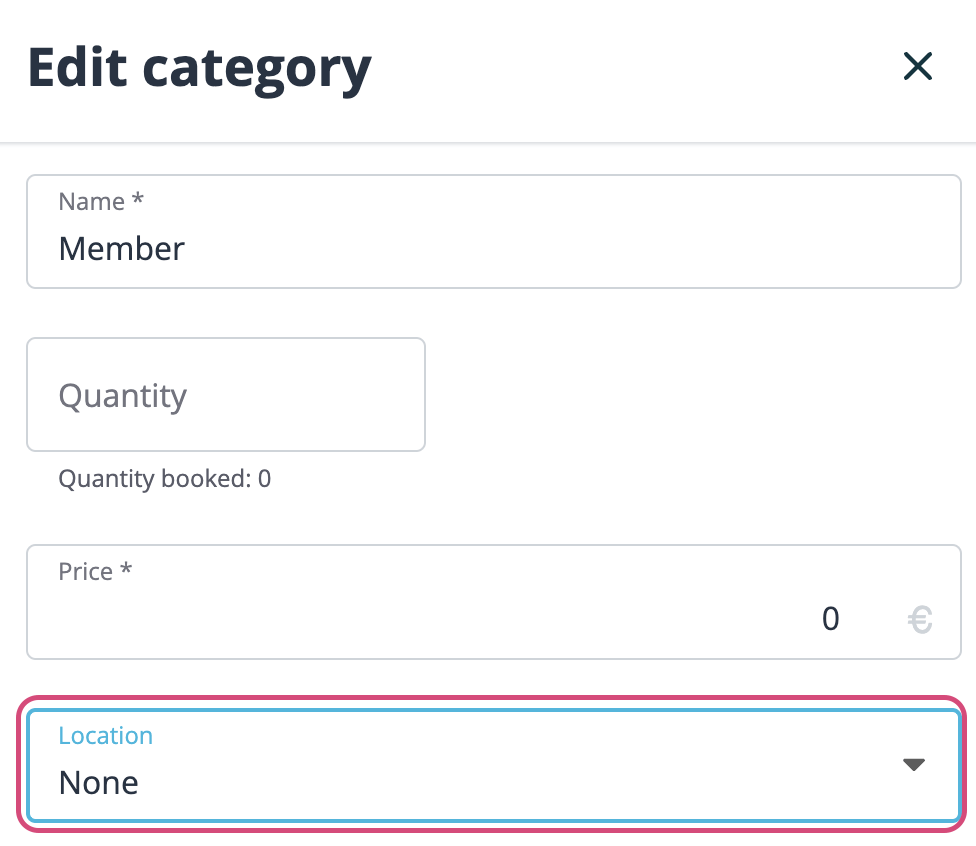
Other locations can be added in Tickets > Locations > Additional locations.
Indeed, if you have one event but multiple physical or online locations on different dates and across several time zones, simply link a specific location to each of your event categories and options. Our session check-in system will allow you to scan attendees at each individual location.
In their confirmation emails, your attendees will receive a link for every individual session they registered for. They will be able to add each session to their calendars (Google, iCal, Outlook and Yahoo), with the details about location, date, and time. For an online location, they will receive the link to the countdown page instead of the physical address.
You can display a filter to sort your options by location on the registration page.
Pricing plan
You have the choice between organizing a free or a paid event.
Organize a paid event and enable registrants to purchase tickets online. You can set different prices for multiple categories and options within your event.
Manage the whole invoicing directly from event registration (see Invoice chapter).
Tip: Once you have registered attendees, the pricing, currency and taxes options are no longer editable. Make sure to correctly configure these settings prior to opening registrations.
Registration flow
Customize the different steps of the registration process. Decide whether to first start with the registration form or the categories and options to which people can register. In case of free events, you can also hide the Tickets and Check-out pages.

Event access rights
A locked event can only be edited and accessed by Event Owners (the person who created the event or anyone who is added as such), Admins and any customized role which is given the permission. Other users would only see the event in the event list, but can't edit it or access the list of attendees.